Butterfinger Balls No-Bake Sweet Treats!: The Only Recipe You’ll Ever Need
Imagine craving a decadent dessert that satisfies your sweet tooth without turning on the oven—enter Butterfinger Balls No-Bake Sweet Treats, the ultimate no-fuss indulgence for busy home cooks. These irresistible treats combine the nostalgic crunch of Butterfinger candy with creamy peanut butter and rich chocolate, all in a recipe that’s ready in under an hour. As the go-to expert at cookinwithlalyta.com, I’m excited to share this no-bake wonder that transforms simple ingredients into pure bliss, making it perfect for spontaneous gatherings or a quick family treat. With its effortless preparation and that signature crispy-crunchy texture, this recipe stands out as the best online resource for mastering Butterfinger Balls No-Bake Sweet Treats without any baking hassles.
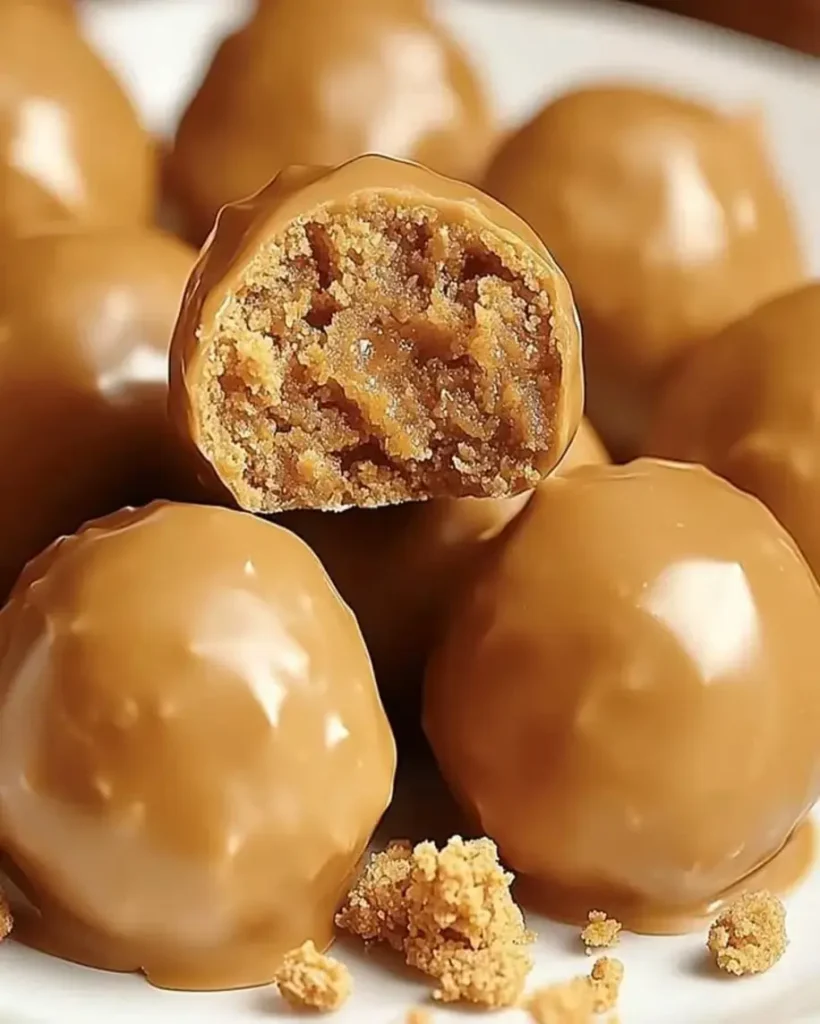
The moment these Butterfinger Balls hit your palate, you’ll be greeted by an explosion of flavors and textures that dance on your tongue. The crispy-crunch from the crushed Butterfinger candy provides a delightful contrast to the smooth, velvety peanut butter base, while the melted chocolate coating adds a glossy sheen and a melt-in-your-mouth richness. Each bite delivers a perfect balance of sweet and salty notes, with the powdered sugar lending a subtle silkiness that makes these treats utterly addictive. The aroma of fresh peanut butter and chocolate wafting through your kitchen will build anticipation, turning a simple dessert into a sensory adventure that feels almost too good to be true.
What sets this Butterfinger Balls No-Bake Sweet Treats recipe apart on cookinwithlalyta.com is its reliability, crafted by Chef Lalybeth with years of testing and perfecting. Unlike other versions that might leave you with soggy results, this one incorporates a chef’s secret for achieving that ideal crispy-crunchy exterior while keeping the inside delightfully soft. You’ll learn insider tips on ingredient swaps, common pitfalls to avoid, and creative serving ideas that make this the single most comprehensive guide online. By the end, you’ll feel confident whipping up these treats like a pro, impressing friends and family with minimal effort.
Why This Butterfinger Balls No-Bake Sweet Treats Recipe is a Game-Changer
The Chef’s Secret: The unique angle here is the “no-bake magic” that elevates these treats with a simple technique of chilling the mixture for optimal texture. By melting the unsalted butter just right and combining it with creamy peanut butter, we create a base that’s easy to roll and locks in that irresistible crispy-crunch from the Butterfinger candy. This method ensures the balls hold their shape without baking, making it a game-changer for hot days or when you’re short on time, resulting in a dessert that’s both foolproof and flavorful.
Unbeatable Texture: The science behind the texture lies in the interaction between the fats in the peanut butter and melted butter, which emulsify with the powdered sugar to form a pliable mixture. When chilled, the fats solidify just enough to give a satisfying crunch, enhanced by the Butterfinger fragments, creating a contrast that mimics professional candies without any oven use. This careful balance prevents the balls from becoming too hard or too soft, ensuring every bite is perfectly textured.
Foolproof for a Reason: This recipe has been tested multiple times in my kitchen to guarantee success, even for beginners. With precise measurements and step-by-step guidance, you’ll avoid common issues like overly sticky mixtures or uneven coating, making Butterfinger Balls No-Bake Sweet Treats a reliable staple for any occasion.
Ingredient Spotlight: Quality Makes the Difference
For crushed Butterfinger candy bars, this ingredient is the star, providing that iconic crispy-crunch that defines Butterfinger Balls No-Bake Sweet Treats. It adds a unique blend of chocolate and peanut butter flavors with a toffee-like snap, making the treats nostalgic and irresistible. Always opt for fresh, high-quality candy bars to ensure the crunch isn’t compromised by staleness—crushing them finely but not to dust preserves the texture. If needed, substitute with crushed peanut brittle or Snickers bars for a similar sweet-salty profile, but adjust for sweetness as Butterfinger has a distinct taste.
Creamy peanut butter serves as the binding agent, delivering rich, nutty flavors that tie everything together in these Butterfinger Balls No-Bake Sweet Treats. Choose a natural, high-fat variety without added sugars for the creamiest results, as it ensures the mixture holds without becoming greasy. Its role is crucial for moisture and flavor balance, preventing the balls from drying out. A great substitution is almond butter for a nuttier twist, or sunflower seed butter if you’re dealing with allergies, though it might slightly alter the traditional taste.
Powdered sugar acts as the sweetener and thickener, giving the mixture its smooth, rollable consistency in Butterfinger Balls No-Bake Sweet Treats. Using high-quality, finely sifted sugar avoids grittiness and helps achieve that perfect sweetness level. It absorbs excess moisture from the peanut butter, creating a dough-like texture that’s easy to shape. For a lower-sugar option, swap with a mix of powdered erythritol, but be mindful that it might make the balls less firm due to differences in absorption.
Unsalted butter, when melted, provides the fat needed for cohesion and richness in these Butterfinger Balls No-Bake Sweet Treats. Select European-style butter for its higher fat content, which enhances creaminess and prevents the mixture from cracking during chilling. Its role is to bind ingredients without overpowering flavors. A suitable substitute is coconut oil for a dairy-free version, ensuring it’s solidified in the fridge to maintain structure.
Chocolate coating for dipping locks in the flavors and adds a glossy finish to Butterfinger Balls No-Bake Sweet Treats. High-quality, real chocolate melts smoothly and sets quickly, providing a professional touch. It enhances the overall indulgence with its snap and sheen. Opt for dark chocolate for a richer taste, or use candy melts as a substitute if you need something that hardens faster, though they may lack the depth of flavor.
Step-by-Step Instructions
Step 1: Preparing the Mixture
In a large bowl, combine 1 cup crushed Butterfinger candy bars, 1 cup creamy peanut butter, 2 cups powdered sugar, and 1/2 cup melted unsalted butter until the mixture is evenly blended and forms a thick, dough-like consistency. Use a sturdy spoon or your hands to ensure all ingredients are fully incorporated, working quickly to avoid the butter cooling too fast.
Pro Tip: Measure ingredients precisely to prevent the mixture from becoming too dry or sticky—adding a teaspoon of extra melted butter can help if it feels crumbly.
Step 2: Rolling the Balls
Once mixed, roll the mixture into small, uniform balls about 1 inch in diameter and place them on a baking sheet lined with parchment paper. This step shapes the treats and prepares them for chilling.
Common Mistake to Avoid: Don’t make the balls too large, as they won’t chill evenly; aim for consistency to ensure even texture—overhandling can make them greasy, so work with cool hands.
Step 3: Chilling the Balls
Refrigerate the rolled balls for about 30 minutes until they firm up and hold their shape, making them easier to dip later.
Pro Tip: Chill in a single layer to avoid sticking; if your refrigerator is warm, extend the time to 45 minutes for the best results.
Step 4: Melting the Chocolate
Melt 1 cup of chocolate coating according to the package instructions, using a double boiler or microwave in short bursts to achieve a smooth, lump-free consistency.
Common Mistake to Avoid: Overheating the chocolate can cause it to seize; stir frequently and use low heat to keep it glossy and easy to work with.
Step 5: Dipping the Balls
Dip each chilled ball into the melted chocolate, ensuring full coverage, then return them to the parchment-lined baking sheet to set.
Pro Tip: Use a fork or toothpick for dipping to minimize mess and get an even coat—tap off excess chocolate for a professional finish.
Step 6: Final Chilling
Refrigerate the dipped balls again for about 15 minutes until the chocolate fully sets, resulting in a shiny, firm exterior.
Common Mistake to Avoid: Don’t rush this step; improper setting can lead to melty treats, so ensure the fridge is at the right temperature for optimal results.
Step 7: Serving
Serve the Butterfinger Balls No-Bake Sweet Treats once chilled, enjoying their fresh, crunchy texture.
Pro Tip: Let them sit at room temperature for a minute before serving to enhance flavor release.
Serving & Presentation
For a stunning presentation of Butterfinger Balls No-Bake Sweet Treats, arrange them on a decorative platter with a sprinkle of crushed peanuts or a dusting of cocoa powder for added visual appeal. Their glossy chocolate exterior makes them naturally eye-catching, but you can elevate them by placing them in colorful cupcake liners or on a bed of edible flowers for a festive touch. Pair these treats with fresh fruit like sliced strawberries or bananas to balance the sweetness, or serve alongside a scoop of vanilla ice cream for a decadent dessert course that complements their nutty flavors.
When hosting, consider these as the perfect bite-sized option for parties, plated individually on small dessert plates with a side of whipped cream. For a complete meal, they shine as an after-dinner treat following lighter American cuisine dishes like grilled salads or soups, providing a sweet finale that ties the meal together.
Make-Ahead & Storage Solutions
Make-Ahead Strategy: Prepare the mixture and roll the balls up to 3 days in advance; store them in an airtight container in the refrigerator without dipping. On the day of serving, simply melt the chocolate and dip for fresh results, saving you time during busy events.
Storing Leftovers: Keep Butterfinger Balls in an airtight container in the fridge for up to a week to maintain their crispy texture; for longer storage, freeze them in a single layer on a baking sheet first, then transfer to a freezer-safe bag for up to 2 months. This prevents sogginess and preserves flavor.
The Best Way to Reheat: To restore the original texture, let frozen balls thaw in the fridge overnight, then bring to room temperature for 10 minutes before serving. Avoid microwaving, as it can make the chocolate soft; instead, use a brief room-temperature rest to keep them firm and flavorful.
Frequently Asked Questions (FAQ)

How do you make Butterfinger balls without baking?
To make Butterfinger Balls No-Bake Sweet Treats, simply mix the crushed candy, peanut butter, powdered sugar, and melted butter into a dough, roll into balls, chill, dip in melted chocolate, and chill again. This no-bake method relies on refrigeration for setting, making it ideal for quick desserts without any oven use.
What can I substitute for Butterfinger candy in the recipe?
For Butterfinger candy, you can substitute with crushed peanut brittle or Snickers bars to maintain the crunchy, peanut-infused element. If you’re aiming for a similar flavor, try using chopped toffee bits, but adjust the quantity to ensure the texture remains balanced in your Butterfinger Balls No-Bake Sweet Treats.
How long does it take to prepare and chill Butterfinger balls?
Preparing Butterfinger Balls No-Bake Sweet Treats takes about 15 minutes for mixing and rolling, with an initial chilling time of 30 minutes and another 15 minutes after dipping, totaling around 45 minutes from start to finish. This quick process makes it a convenient recipe for spontaneous treats.
What are some ways to serve or store Butterfinger balls?
Serve Butterfinger Balls at room temperature for the best texture, either as a standalone snack, on a dessert platter, or paired with coffee for a sweet contrast. For storage, keep them in the refrigerator for up to a week or freeze for longer, always in an airtight container to preserve freshness.
Can I make this recipe vegan?
Yes, you can make Butterfinger Balls No-Bake Sweet Treats vegan by substituting the peanut butter with a vegan variety, using vegan butter instead of unsalted butter, and opting for vegan chocolate coating. Ensure all ingredients are plant-based to maintain the recipe’s integrity and deliciousness.
How can I adjust the sweetness in Butterfinger balls?
To adjust sweetness, reduce the powdered sugar by 1/4 cup increments and taste the mixture, or use a sugar substitute like stevia. This allows you to customize Butterfinger Balls No-Bake Sweet Treats for different preferences while keeping the texture intact.
Tried This Recipe? Leave a Comment!
Did you make this recipe? I’d love to hear how it turned out! Please leave a comment and a rating below. Your feedback helps other home cooks and supports cookinwithlalyta!
For more delicious inspiration, follow me on Pinterest!
Butterfinger Balls No-Bake Sweet Treats
- Total Time: 45 minutes
- Yield: 24 balls 1x
Description
Delicious no-bake treats made with crushed Butterfinger candy, peanut butter, and sugar, perfect for a quick dessert.
Ingredients
- 1 cup crushed Butterfinger candy bars
- 1 cup creamy peanut butter
- 2 cups powdered sugar
- 1/2 cup unsalted butter, melted
- 1 cup chocolate coating for dipping
Instructions
- In a large bowl, combine crushed Butterfinger candy, peanut butter, powdered sugar, and melted butter until well mixed.
- Roll the mixture into small balls and place them on a baking sheet lined with parchment paper.
- Refrigerate the balls for about 30 minutes until firm.
- Melt the chocolate coating according to package instructions.
- Dip each ball into the melted chocolate and return to the baking sheet.
- Refrigerate again until the chocolate sets, about 15 minutes.
- Serve and enjoy!
Notes
Store in an airtight container in the refrigerator for up to a week. These are great for parties or as a sweet snack.
- Prep Time: 15 minutes
- Cook Time: 0 minutes
- Method: Dessert
- Cuisine: American
Nutrition
- Calories: 150
- Sugar: 14g
- Fat: 8g
- Carbohydrates: 18g
- Protein: 3g
Conclusion
These Butterfinger Balls are a simple, no-bake delight that capture the irresistible crunch and peanut buttery sweetness of your favorite candy bar, making them perfect for quick treats or last-minute gatherings. With their easy preparation, they offer a fun way to satisfy your chocolate cravings without turning on the oven. For a tasty variation, try rolling them in crushed nuts or drizzling with melted chocolate to add extra texture and flavor.