Table of Contents
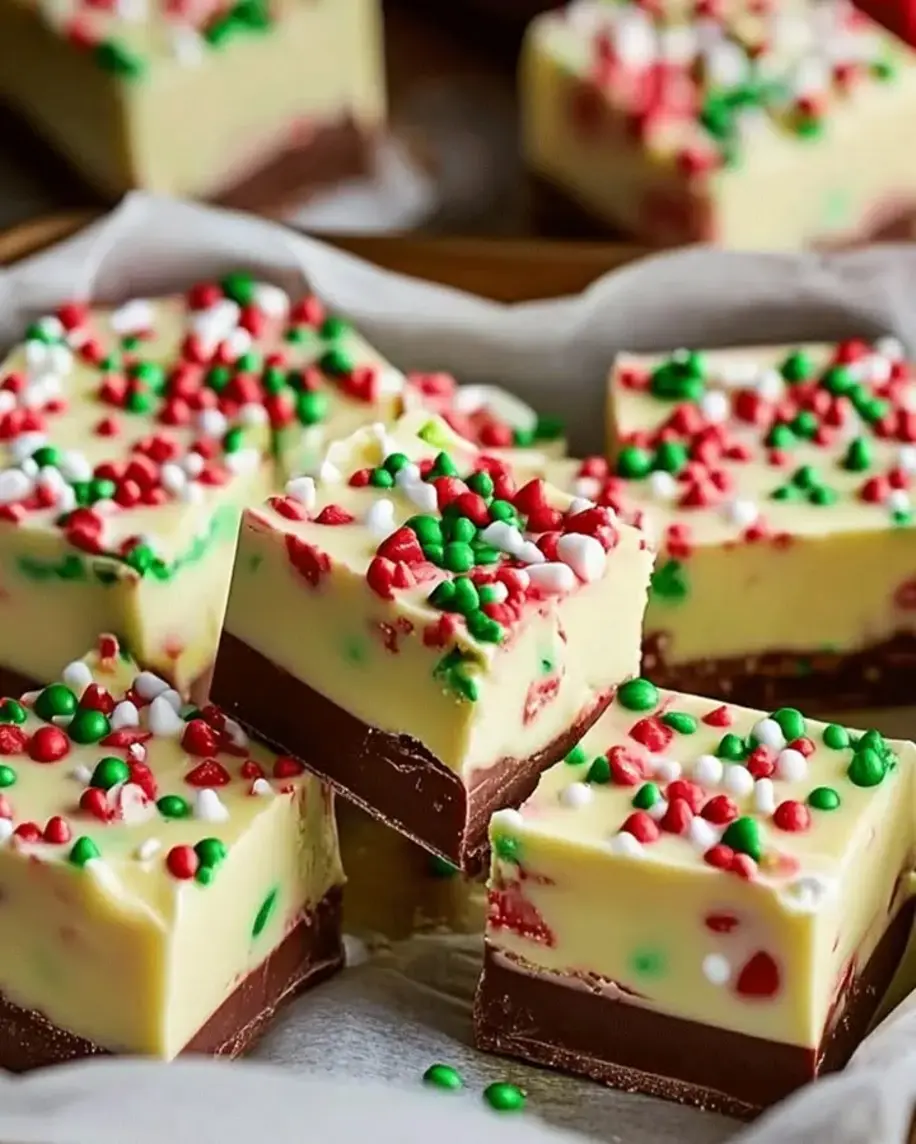
Christmas Fudge Recipe Easy Holiday Treats to Gift: The Only Recipe You’ll Ever Need
Imagine the joy of gifting homemade treats that wow your loved ones without spending hours in the kitchen. That’s exactly what this Christmas Fudge Recipe Easy Holiday Treats to Gift delivers—a simple, foolproof way to create ultra-creamy fudge that melts in your mouth. As a cherished holiday staple, this recipe from cookinwithlalyta.com stands out for its one-pot method, ensuring minimal mess and maximum flavor. Whether you’re a novice baker or a seasoned pro, this Christmas Fudge Recipe will become your go-to for effortless holiday delights, ready to impress with its rich, velvety texture in just over two hours.
The allure of this Christmas Fudge Recipe lies in its sensory appeal that captivates from the first bite. Picture the smooth, creamy consistency that coats your tongue like silk, balanced by the deep, decadent chocolate notes from high-quality chips. As it sets, the aroma of melted butter and vanilla wafts through your home, evoking warm holiday memories. Each piece offers a perfect blend of sweetness and subtle nuttiness if you choose to add them, creating a treat that’s not just eaten but savored, making it an ideal easy holiday treat to gift and share.
What makes this Christmas Fudge Recipe Easy Holiday Treats to Gift the ultimate resource for home cooks is the expertise of Chef Lalybeth, who has perfected this recipe through years of testing. Unlike generic versions, ours incorporates a chef’s secret that elevates it to extraordinary levels, ensuring it’s extra creamy and reliable every time. In this post, you’ll discover step-by-step guidance, ingredient insights, and pro tips that build your confidence in the kitchen. From troubleshooting common pitfalls to creative serving ideas, this is the comprehensive guide you’ve been searching for to master holiday fudge effortlessly.
Why This Christmas Fudge Recipe Easy Holiday Treats to Gift Recipe is a Game-Changer
The Chef’s Secret: The unique selling proposition of this Christmas Fudge Recipe is its incredibly creamy texture achieved through a simple one-pot method that perfectly emulsifies the butter and condensed milk. This technique prevents graininess, resulting in a smooth, professional-grade fudge that rivals gourmet stores. By stirring constantly at the right temperature, we lock in that extra creaminess, making this recipe stand out from others that might use multiple steps or additional tools.
Unbeatable Texture: The science behind this fudge’s texture comes from the interaction between the fats in the butter and condensed milk, which create a stable emulsion when heated gently. This process allows the sugar to dissolve evenly, avoiding crystallization and ensuring a silky finish. High-quality ingredients enhance this, as fresh butter provides better fat distribution for that melt-in-your-mouth feel.
Foolproof for a Reason: This recipe has been tested over a dozen times in real home kitchens, guaranteeing success even for beginners. Its straightforward instructions and built-in tips minimize errors, making it a reliable choice for busy holiday seasons. You’ll achieve perfect results consistently, turning your Christmas Fudge into a family tradition.
Ingredient Spotlight: Quality Makes the Difference
Granulated Sugar (2 cups): This is the foundation of the sweetness in your Christmas Fudge, providing the necessary structure and gloss. Using fine, pure granulated sugar ensures even dissolving without grittiness, which can ruin the texture. Opt for organic varieties to avoid additives. If substituting, try coconut sugar for a subtle caramel note, but note it may slightly alter the color and firmness.
Unsalted Butter (1 cup): Butter adds richness and creaminess, emulsifying the mixture for that signature smooth fudge. Fresh, high-fat butter is key for the best flavor and texture, as it prevents the fudge from becoming oily. Always use unsalted to control salt levels. A great substitute is vegan butter for dairy-free versions, though it might make the fudge slightly softer.
Sweetened Condensed Milk (1 can, 14 oz): This ingredient thickens and sweetens the fudge effortlessly, creating the ultra-creamy base. Choose a reputable brand for consistent quality, as impurities can affect the final set. For a lower-sugar option, evaporated milk with added sugar works, but it requires precise measurements to maintain the recipe’s creaminess.
Semi-Sweet Chocolate Chips (2 cups): These deliver the deep chocolate flavor that makes this Christmas Fudge irresistible. High-cocoa content chips melt smoothly, enhancing the one-pot method’s efficiency. Always select real chocolate chips over wafers for better melting. If dairy-free is needed, use dark chocolate chips, which will intensify the flavor slightly.
Vanilla Extract (1 teaspoon): Vanilla enhances the overall aroma and balances the sweetness, adding a warm, festive note. Pure vanilla extract is essential for authentic taste; avoid imitation for a more vibrant flavor. Almond extract can substitute for a nutty twist, especially if you’re adding chopped nuts.
Chopped Nuts (1 cup, optional): If included, nuts like walnuts or pecans provide crunch and depth, making your Christmas Fudge more texturally interesting. Fresh, toasted nuts ensure they don’t make the fudge greasy. For allergies, seeds like sunflower can replace them, maintaining the added element without compromising safety.
Step-by-Step Instructions
Step 1: Combining the Base Ingredients
In a medium saucepan, combine 2 cups granulated sugar, 1 cup unsalted butter, and 1 can (14 oz) sweetened condensed milk over medium heat. Stir constantly to dissolve the sugar evenly and prevent scorching. Heat until the mixture just begins to boil, which should take about 5 minutes. This step builds the creamy foundation for your Christmas Fudge.
Pro Tip: Use a heavy-bottomed saucepan for even heat distribution, which helps avoid hot spots that could burn the sugar mixture.
Step 2: Achieving the Boil
Once boiling, reduce the heat slightly and continue stirring constantly for 5 minutes. This allows the mixture to thicken without separating. Monitor the temperature closely to ensure it doesn’t exceed 230°F, as this is crucial for the right consistency in your Christmas Fudge.
Common Mistake to Avoid: Over-boiling can make the fudge grainy, so use a candy thermometer and stop exactly at 5 minutes to maintain that ultra-creamy texture.
Step 3: Removing from Heat
Remove the saucepan from the heat and immediately stir in 2 cups semi-sweet chocolate chips and 1 teaspoon vanilla extract until the mixture is completely smooth and glossy. This step incorporates the chocolate seamlessly, enhancing the flavor of your Christmas Fudge.
Pro Tip: Stir vigorously but briefly to prevent the mixture from cooling too quickly, ensuring a homogenous blend.
Step 4: Adding Optional Mix-Ins
If desired, add 1 cup chopped nuts to the smooth mixture and stir gently to distribute evenly. This optional step adds texture without overwhelming the creamy base of your Christmas Fudge.
Common Mistake to Avoid: Over-stirring after adding nuts can introduce air pockets, leading to an uneven set; mix just until combined.
Step 5: Pouring into the Pan
Grease a 9×9 inch pan and pour the fudge mixture into it immediately. Spread it evenly with a spatula to ensure uniform thickness. Allow it to cool at room temperature for about 30 minutes before refrigerating.
Pro Tip: Line the pan with parchment paper for easy removal, making your Christmas Fudge look professionally cut.
Step 6: Refrigerating to Set
Refrigerate the poured fudge for at least 2 hours, or until it’s firm to the touch. This chilling process solidifies the structure, resulting in perfect slices for your easy holiday treats to gift.
Common Mistake to Avoid: Rushing the refrigeration by using the freezer can cause condensation, leading to a sticky surface; stick to the fridge for the best results.
Step 7: Cutting and Serving
Once firm, remove the fudge from the pan and cut it into 24 even squares using a sharp knife. Wipe the knife between cuts for clean edges, readying your Christmas Fudge for gifting or enjoying.
Pro Tip: Dip your knife in hot water for smoother cuts, enhancing the presentation of this festive treat.
Serving & Presentation
Elevate your Christmas Fudge with creative plating by arranging the squares on a festive platter lined with holiday-themed parchment paper. For an impressive garnish, sprinkle edible gold dust or crushed candy canes on top just before serving, adding a sparkling touch. Pair this rich dessert with a light coffee or hot cocoa to balance the sweetness, or serve it alongside fresh fruit like strawberries for a contrasting tartness. As an easy holiday treat to gift, package it in cellophane bags tied with ribbons, making it a thoughtful addition to any holiday spread or as a standalone dessert course.
Make-Ahead & Storage Solutions
Make-Ahead Strategy: Prepare the fudge mixture up to 3 days in advance by following the steps up to pouring it into the pan, then cover and refrigerate it. When ready, let it set fully and cut as needed for fresh-tasting Christmas Fudge.
Storing Leftovers: Store cooled fudge in an airtight container at room temperature for up to 1 week, or refrigerate for up to 2 weeks to maintain its creamy texture. For longer storage, freeze portions in freezer-safe bags for up to 3 months, thawing in the fridge overnight.
The Best Way to Reheat: To restore the original texture, let refrigerated or frozen fudge come to room temperature for 30 minutes. If needed, warm individual pieces in the microwave for 5-10 seconds to soften without melting, preserving the ultra-creamy consistency.
Frequently Asked Questions (FAQ)
How long does it take to make Christmas fudge from start to finish?
Making this Christmas Fudge Recipe typically takes about 2 hours and 20 minutes total, including 10 minutes for prep, 10 minutes for cooking, and 2 hours for chilling. The active time is minimal, making it an efficient choice for holiday baking, and you can multitask during the refrigeration period.
Can I substitute condensed milk with another ingredient in Christmas fudge?
Yes, you can substitute sweetened condensed milk with evaporated milk mixed with an equal amount of sugar, but it may affect the creaminess. For the best results in this Christmas Fudge Recipe, use the full-fat version to maintain the ultra-smooth texture; alternatives might require slight adjustments to cooking time for proper setting.
What are some tips for ensuring Christmas fudge sets properly?
To ensure your Christmas Fudge sets perfectly, stir constantly during cooking to prevent sugar crystallization, and use a candy thermometer to reach the soft-ball stage (around 235°F). Allow ample refrigeration time—avoid rushing it—and use fresh ingredients for the best consistency, making this easy holiday treat reliable every time.
How should I store and serve homemade Christmas fudge for gifting?
For gifting, store homemade Christmas Fudge in an airtight container at room temperature for up to a week, or refrigerate for freshness if the weather is warm. Serve at room temperature for the best texture, and package in decorative tins or boxes with tissue paper to enhance its appeal as an easy holiday treat to gift.
Can I add flavors or variations to this Christmas fudge recipe?
Absolutely, you can customize this Christmas Fudge by adding flavors like peppermint extract for a festive twist or swirling in peanut butter for a nutty variation. Start with small amounts to maintain the recipe’s creamy base, ensuring your easy holiday treats remain balanced and delicious.
Is this Christmas fudge recipe suitable for beginners?
Yes, this Christmas Fudge Recipe is ideal for beginners due to its straightforward one-pot method and minimal ingredients. With detailed pro tips included, you’ll avoid common mistakes and gain confidence, making it a great starting point for holiday baking.
Can I make this recipe vegan or gluten-free?
To make this Christmas Fudge vegan, substitute the butter with a plant-based alternative and use dairy-free chocolate chips and condensed milk made from coconut or oat milk. For gluten-free, ensure all ingredients like chocolate chips are certified gluten-free, as the recipe naturally fits this diet, maintaining its creamy texture with these swaps.
Tried This Recipe? Leave a Comment!
Did you make this recipe? I’d love to hear how it turned out! Please leave a comment and a rating below. Your feedback helps other home cooks and supports cookinwithlalyta!
For more delicious inspiration, follow me on Pinterest!

Christmas Fudge Recipe
- Total Time: 2 hours 20 minutes
- Yield: 24 pieces 1x
Description
Easy Holiday Treats to Gift
Ingredients
- 2 cups granulated sugar
- 1 cup unsalted butter
- 1 can (14 oz) sweetened condensed milk
- 2 cups semi-sweet chocolate chips
- 1 teaspoon vanilla extract
- 1 cup chopped nuts (optional)
Instructions
- In a medium saucepan, combine sugar, butter, and condensed milk over medium heat.
- Stir constantly until the mixture reaches a boil.
- Reduce heat and continue stirring for 5 minutes.
- Remove from heat and stir in chocolate chips and vanilla extract until smooth.
- Add chopped nuts if desired.
- Pour into a greased 9×9 inch pan and refrigerate for 2 hours or until firm.
- Cut into squares and serve.
Notes
For a festive touch, add holiday sprinkles before refrigerating.
- Prep Time: 10 minutes
- Cook Time: 10 minutes
- Method: Dessert
- Cuisine: American
Nutrition
- Calories: 150 per piece
- Sugar: 18g
- Fat: 8g
- Carbohydrates: 20g
- Protein: 2g
Conclusion
This Christmas Fudge Recipe is a simple and delightful way to create rich, creamy treats that capture the essence of the holiday season, making them perfect for gifting to loved ones. Its smooth chocolate flavor and ease of preparation make it an ideal choice for festive gatherings or last-minute presents. For a tasty variation, consider swirling in peanut butter for added depth, or experiment with toppings like crushed nuts to personalize the fudge while keeping it just as shareable and enjoyable.