Table of Contents
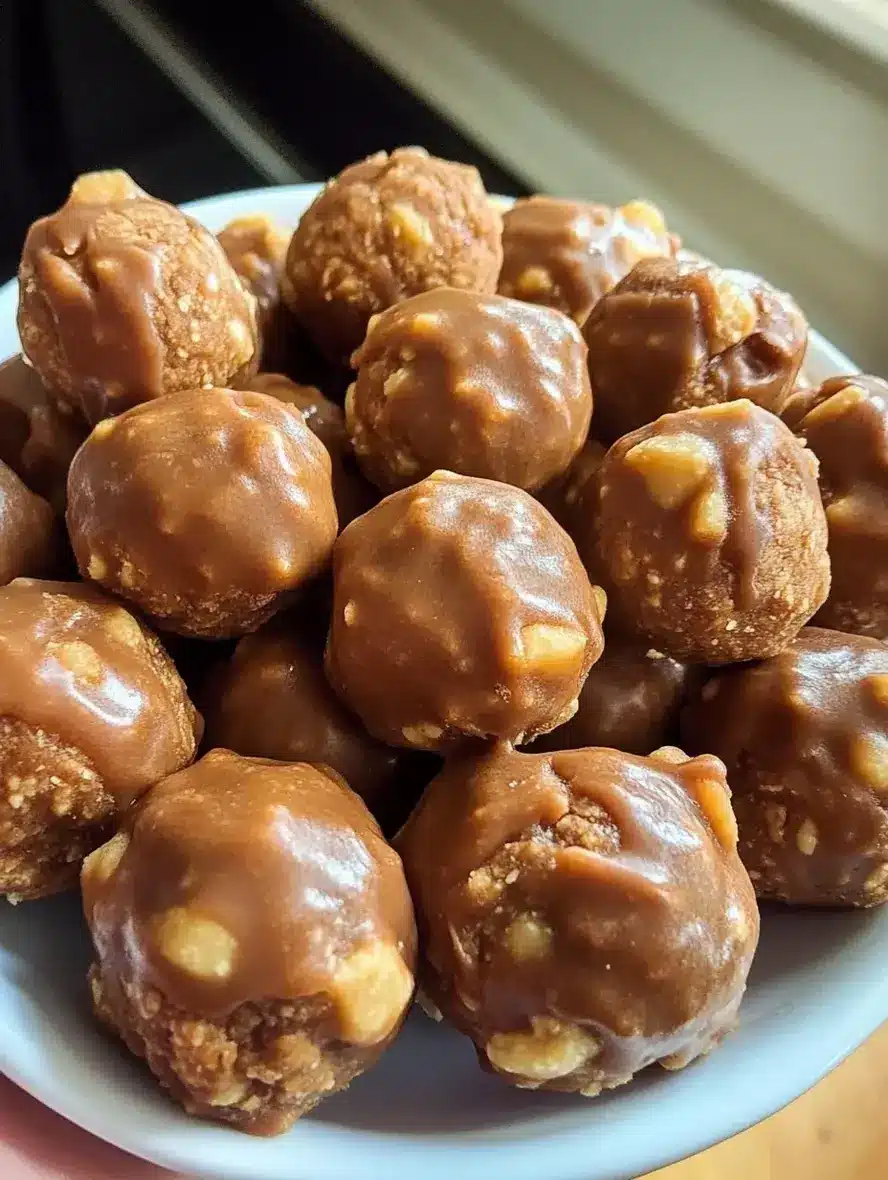
Butterfinger Balls: The Only Recipe You’ll Ever Need
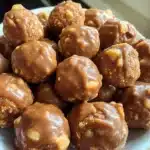
Imagine craving a sweet, no-bake treat that combines the irresistible crunch of Butterfinger candy with a creamy peanut butter base, all without turning on your oven. Butterfinger Balls are the ultimate dessert for busy home cooks who want that perfect blend of textures in every bite. As a favorite from cookinwithlalyta.com, this recipe delivers an effortlessly creamy and crunchy experience that sets it apart from ordinary candy recipes. Whether you’re preparing for a party or a quick family snack, these Butterfinger Balls will become your go-to indulgence, satisfying your sweet tooth with minimal effort and maximum flavor.
The moment you bite into one of these Butterfinger Balls, you’ll be greeted by a symphony of sensations: the smooth, velvety creaminess from the peanut butter mingling with the sharp, satisfying crunch of crushed Butterfinger pieces, all enveloped in a rich chocolate coating that melts on your tongue. Each ball offers a delightful contrast of textures—the soft interior yields to a crispy exterior, releasing aromas of roasted peanuts and sweet chocolate that fill the air. It’s like a nostalgic trip to your favorite candy store, but homemade and far superior in taste and freshness.
What makes this Butterfinger Balls recipe from cookinwithlalyta.com truly special is the expertise of Chef Lalybeth, whose years of testing and perfecting no-bake desserts ensure foolproof results every time. You’ll discover the Chef’s Secret for achieving that ultra-crunchy yet creamy texture that elevates these treats above any store-bought version. In this comprehensive guide, we’ll cover everything from ingredient selection to storage tips, helping you master this recipe with confidence and impress your loved ones with your baking prowess—no oven required!
Why This Butterfinger Balls Recipe is a Game-Changer
The Chef’s Secret to this Butterfinger Balls recipe lies in the harmonious blend of creamy peanut butter and crushed Butterfinger candy, creating an effortlessly creamy and crunchy no-bake delight that stands out from typical desserts. By melting the butter just right and incorporating it fully, we achieve a base that’s not only smooth but also locks in the candy’s crunch, preventing it from becoming soggy. This technique ensures each ball has a perfect balance of textures, making it the go-to recipe for anyone seeking a quick, high-impact treat.
Unbeatable Texture: The science behind the texture comes from the powdered sugar acting as a binder, while the crushed Butterfinger bars provide structural integrity without dissolving. This results in a firm yet tender interior that contrasts beautifully with the chocolate coating, thanks to the refrigeration step that allows the fats to solidify properly.
Foolproof for a Reason: This recipe has been tested multiple times in our kitchen to guarantee success, even for novice bakers. With straightforward steps and precise measurements, you’ll avoid common pitfalls and end up with consistently delicious Butterfinger Balls that wow every time.
Ingredient Spotlight: Quality Makes the Difference
Creamy Peanut Butter: This is the heart of our Butterfinger Balls, providing the creamy base that ties everything together with its rich, nutty flavor. Using a high-quality, natural creamy peanut butter ensures a smooth texture without added oils or sugars that could overwhelm the taste. Opt for one with no added salt for the purest flavor; if you’re sensitive to peanuts, a substitution like sunflower seed butter works wonders for a nut-free version, maintaining that essential creaminess.
Crushed Butterfinger Candy Bars: These add the signature crunchy element that makes Butterfinger Balls so addictive, delivering a caramelized peanut crunch in every bite. Fresh, high-quality bars ensure the pieces retain their crispness—stale candy can make the mixture gummy. For a variation, try substituting with crushed peanut brittle to amp up the crunch, but be sure to crush them finely for even distribution.
Powdered Sugar: Acting as a sweetener and thickener, powdered sugar helps bind the ingredients into a moldable dough without making it overly sticky. Choose a finely sifted brand to avoid grittiness; it’s crucial for that melt-in-your-mouth feel. If you’re watching your sugar intake, a sugar-free alternative like erythritol can be swapped in, though it may slightly alter the texture.
Melted Butter: This ingredient adds moisture and richness, helping to create a cohesive mixture that’s easy to roll. Using unsalted butter allows you to control the saltiness, enhancing the overall flavor profile. For a dairy-free twist, coconut oil is a great substitute, as it solidifies when chilled, preserving the structure of the balls.
Chocolate Chips for Coating: High-quality chocolate chips provide a glossy, decadent coating that seals in the flavors and adds a luxurious finish. Opt for semi-sweet or dark chocolate to balance the sweetness; melting them slowly prevents seizing, ensuring a smooth dip. Vegan chocolate chips can easily replace traditional ones for a plant-based option, maintaining the recipe’s integrity.
Butterfinger Balls: Step-by-Step Instructions
Step 1: Mixing the Ingredients
In a large bowl, combine 1 cup of creamy peanut butter, 2 cups of crushed Butterfinger candy bars, 2 cups of powdered sugar, and 1/2 cup of melted butter. Stir everything together until the mixture is fully incorporated and forms a thick, dough-like consistency. This step is key to achieving that effortlessly creamy and crunchy texture.
Pro Tip: Make sure the melted butter is cooled slightly before adding it to prevent the peanut butter from separating; this keeps the mixture smooth and easy to work with.
Step 2: Rolling the Balls
Once mixed, roll the dough into 1-inch balls and place them on a baking sheet lined with parchment paper. Aim for uniform size to ensure even chilling and coating later.
Common Mistake to Avoid: Don’t over-handle the dough, as the warmth from your hands can make it too soft—chill your hands under cold water if needed to keep the balls from losing shape.
Step 3: Chilling the Balls
Refrigerate the rolled balls for 30 minutes to firm them up. This step solidifies the fats, making them easier to coat without falling apart.
Pro Tip: Use the middle shelf of your refrigerator for even cooling; this prevents condensation that could affect the texture.
Step 4: Melting the Chocolate
Melt 2 cups of chocolate chips in a microwave-safe bowl, stirring every 30 seconds until smooth and fully melted. This creates a perfect, glossy coating for your Butterfinger Balls.
Common Mistake to Avoid: Overheating the chocolate can cause it to become grainy—always stir frequently and stop once it’s nearly melted, as residual heat will finish the job.
Step 5: Coating the Balls
Dip each chilled ball into the melted chocolate, ensuring an even coating on all sides, then return them to the baking sheet. Use a fork to gently lift them, allowing excess chocolate to drip off.
Pro Tip: For a thicker chocolate layer, double-dip after the first coat sets for about 5 minutes, enhancing that creamy and crunchy contrast.
Step 6: Final Chilling
Refrigerate the coated balls again for 15 minutes until the chocolate fully sets, resulting in a snappy exterior.
Common Mistake to Avoid: Don’t rush this step; premature handling can crack the chocolate coating, ruining the presentation.
Serving & Presentation
To serve Butterfinger Balls, arrange them on a decorative platter with a sprinkle of crushed Butterfinger pieces for added visual appeal and extra crunch. For an impressive presentation, pair them with fresh fruits like strawberries or raspberries to contrast the sweetness, or serve alongside a scoop of vanilla ice cream for a decadent dessert experience. These treats shine as a standalone dessert but also complement American-inspired meals, such as after a grilled barbecue or as part of a holiday candy assortment, making them a versatile choice for any occasion.
Make-Ahead & Storage Solutions
Make-Ahead Strategy: Prepare the mixture up to 3 days in advance by mixing the ingredients, rolling the balls, and storing them in an airtight container in the refrigerator. This allows you to dip them in chocolate just before serving for the freshest texture.
Storing Leftovers: Keep Butterfinger Balls in an airtight container in the refrigerator for up to a week to maintain their creamy and crunchy qualities. For longer storage, freeze them in a single layer on a baking sheet first, then transfer to a freezer-safe bag for up to 3 months, preventing them from sticking together.
The Best Way to Reheat: To restore the original texture, thaw frozen balls in the refrigerator overnight, then let them sit at room temperature for 10-15 minutes. Avoid microwaving, as it can make the chocolate soft—room temperature is key for that perfect snap.
Frequently Asked Questions (FAQ)
What ingredients do I need to make Butterfinger Balls?
To make Butterfinger Balls, you’ll need 1 cup of creamy peanut butter, 2 cups of crushed Butterfinger candy bars, 2 cups of powdered sugar, 1/2 cup of melted butter, and 2 cups of chocolate chips for coating. These simple ingredients come together to create a no-bake dessert that’s both creamy and crunchy, ensuring a straightforward recipe for home cooks.
Can I substitute peanut butter in Butterfinger Balls for a nut-free version?
Yes, you can substitute peanut butter with sunflower seed butter or another nut-free alternative like soy nut butter for a nut-free version of Butterfinger Balls. This swap maintains the creamy texture and flavor profile while making the recipe safe for those with allergies, as suggested in the recipe notes—just ensure the substitute has a similar consistency to avoid altering the dough.
How long do Butterfinger Balls need to chill in the refrigerator?
The Butterfinger Balls need to chill in the refrigerator for 30 minutes after rolling to firm up, and then an additional 15 minutes after coating to set the chocolate. This chilling process is crucial for achieving that perfect, effortlessly creamy and crunchy texture without the balls becoming too soft.
What are some creative ways to serve Butterfinger Balls at a party?
Serve Butterfinger Balls at a party by arranging them in a tiered dessert stand for a visually appealing display, or incorporate them into a DIY candy bar station where guests can customize with toppings like sprinkles or crushed nuts. You could also thread them onto skewers for easy, handheld treats, or pair them with coffee for a sophisticated end to the evening, making them a fun and interactive party favorite.
Can I use different chocolate for the coating?
Absolutely, you can experiment with different chocolates like white or milk chocolate for the coating on Butterfinger Balls to vary the flavor. Just ensure it’s a high-quality melting chocolate to maintain a smooth finish, and remember that darker varieties will add a richer contrast to the creamy filling.
Can I make this recipe vegan?
Yes, you can make this Butterfinger Balls recipe vegan by substituting the butter with a plant-based alternative like vegan margarine or coconut oil, and using dairy-free chocolate chips. Ensure your peanut butter is vegan-friendly, and the result will be a delicious, animal-product-free treat that retains its creamy and crunchy appeal.
Tried This Recipe? Leave a Comment!
Did you make this Butterfinger Balls recipe? I’d love to hear how it turned out! Please leave a comment and a rating below. Your feedback helps other home cooks and supports cookinwithlalyta.com!
For more delicious inspiration, follow me on Pinterest!
Butterfinger Balls
- Total Time: 45 minutes
- Yield: 24 balls 1x
Description
Delicious no-bake treats made with creamy peanut butter, crushed Butterfinger candy bars, and coated in chocolate for a sweet and crunchy dessert.
Ingredients
- 1 cup creamy peanut butter
- 2 cups crushed Butterfinger candy bars
- 2 cups powdered sugar
- 1/2 cup melted butter
- 2 cups chocolate chips for coating
Instructions
- In a large bowl, mix peanut butter, crushed Butterfinger bars, powdered sugar, and melted butter until well combined.
- Roll the mixture into 1-inch balls and place them on a baking sheet lined with parchment paper.
- Refrigerate the balls for 30 minutes to firm up.
- Melt the chocolate chips in a microwave-safe bowl, stirring every 30 seconds until smooth.
- Dip each ball into the melted chocolate, coating evenly, and return to the baking sheet.
- Refrigerate again for 15 minutes until the chocolate sets.
Notes
These treats are best stored in an airtight container in the refrigerator for up to a week. For a nut-free version, substitute peanut butter with sunflower seed butter.
- Prep Time: 15 minutes
- Cook Time: 0 minutes
- Method: Dessert
- Cuisine: American
Nutrition
- Calories: 150
- Sugar: 14g
- Fat: 8g
- Carbohydrates: 18g
- Protein: 3g
Conclusion
These Butterfinger Balls offer a perfect blend of crunchy peanut butter and sweet chocolate, making them an irresistible treat for candy lovers seeking a quick and easy dessert. With their nostalgic flavor reminiscent of the classic candy bar, they’re ideal for sharing at gatherings or enjoying as a satisfying snack. For a fun variation, try rolling them in crushed nuts or drizzling with melted caramel to elevate the taste even further.