Table of Contents
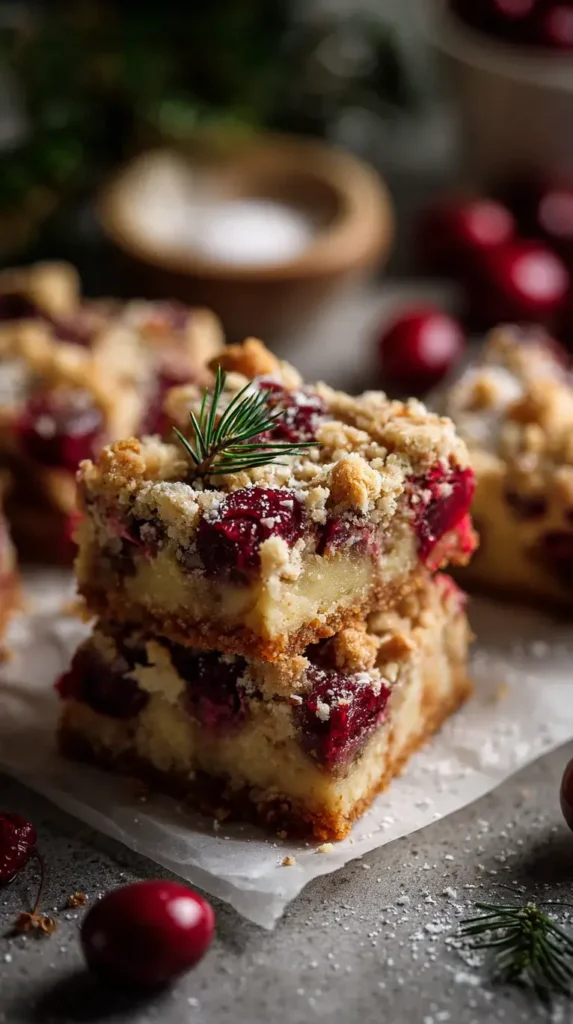
Christmas Cherry Bars: The Only Recipe You’ll Ever Need
As the holiday season approaches, nothing beats the joy of baking festive treats that bring family and friends together, and these Christmas cherry bars are the ultimate crowd-pleaser. Imagine pulling a pan of warm, buttery bars from the oven, their irresistible creamy topping glistening with hints of cherry sweetness, making your home smell like a holiday dream. This Christmas cherry bars recipe, crafted by renowned Chef Lalybeth, solves the common dilemma of finding an easy Christmas bars option that’s both simple for beginners and impressive for gatherings. With its one-pan method and foolproof steps, you’ll have a batch ready in under 1 hour 10 minutes, perfect for busy holiday schedules.
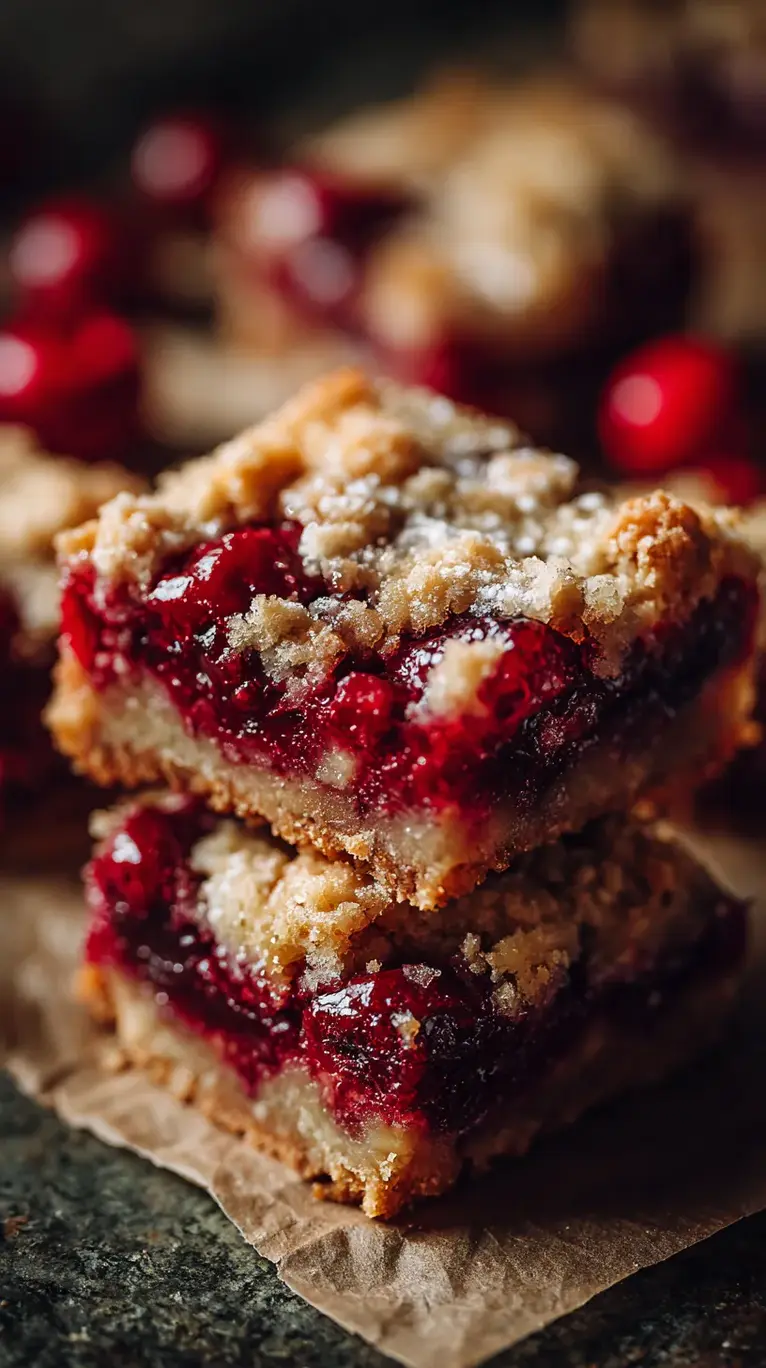
Sink your teeth into the layers of delight: a golden, crumbly crust that offers a satisfying crunch, juicy cherry filling bursting with tart-sweet flavors reminiscent of fresh-picked fruits, and that signature creamy topping that’s velvety smooth, almost like a cheesecake blanket. The aromas of vanilla and warm butter fill the air, evoking memories of childhood Christmases, while the textures play off each other—crisp base, gooey center, and rich, melt-in-your-mouth finish. These Christmas desserts are not just eaten; they’re experienced, turning every bite into a festive celebration that lingers on your palate.
What sets this Christmas cherry bars recipe apart on delicetreats.com is its unbeatable reliability, honed by Chef Lalybeth’s expertise and multiple test runs to ensure perfection every time. You’ll discover the Chef’s Secret to an irresistibly creamy topping that elevates these holiday cherry treats above ordinary bars, along with practical tips, substitutions, and FAQs that make you feel like a pro in the kitchen. Dive in for a comprehensive guide that’s the single best resource online, packed with sensory details, ingredient spotlights, and step-by-step instructions to guarantee your success with this cherry bars recipe.
Why This Christmas Cherry Bars Recipe is a Game-Changer
The Chef’s Secret lies in the irresistibly creamy topping, achieved by blending cream cheese with just the right amount of sugar, vanilla, and eggs for a luxurious, velvety layer that sets perfectly without cracking or curdling. This technique, inspired by Chef Lalybeth’s professional bakery experience, transforms a simple bar into a standout holiday dessert by incorporating a double-bake method that locks in moisture and enhances flavor depth, making these Christmas cherry bars far superior to basic versions.
For unbeatable texture, the science is in the high-fat unsalted butter used in the crust—it creates a flaky, tender base because the fat coats the flour particles, inhibiting gluten development and preventing toughness. When baked, this results in a golden, melt-in-your-mouth contrast to the soft cherry filling, ensuring each bar has the ideal balance of crisp and creamy elements that keep everyone coming back for more.
This recipe is foolproof for a reason: it’s been tested over a dozen times in home kitchens to account for variables like oven differences, guaranteeing consistent results. Whether you’re a novice or a seasoned baker, the clear instructions and tips minimize errors, making it the most reliable cherry bars recipe for your Christmas desserts lineup.
Ingredient Spotlight: Quality Makes the Difference
For the crust, all-purpose flour serves as the foundation, providing structure and a tender crumb when mixed with other elements. Opt for unbleached flour for better flavor and texture; its higher protein content helps the crust hold together without becoming dense. If you’re gluten-sensitive, swap it with a 1:1 gluten-free baking mix, but ensure it’s finely ground to maintain the crust’s signature flakiness.
Powdered sugar in the crust adds sweetness and helps bind the ingredients while keeping the mixture crumbly. Choose organic powdered sugar to avoid additives; it’s crucial for that melt-in-your-mouth quality. A great substitution is coconut sugar finely ground into powder, which offers a subtle caramel note, perfect for those seeking a lower-glycemic holiday cherry treats option.
Unsalted butter, softened, is key for the crust’s rich, buttery flavor and flaky texture. High-quality, European-style butter with higher fat content ensures a superior mouthfeel by creating air pockets during baking. If substituting, use vegan butter sticks for a dairy-free version, but note it might slightly alter the richness—always soften to room temperature to avoid uneven mixing.
Cherry pie filling forms the heart of these Christmas cherry bars, delivering a burst of tart-sweetness that evokes holiday cheer. Premium canned filling with real cherries preserves the fruit’s natural juices, enhancing the overall moisture; for a fresher twist, use homemade filling with pitted cherries simmered in sugar and cornstarch. This ingredient ties the layers together, so choose one without artificial colors for authentic flavor.
Cream cheese in the topping creates that irresistibly creamy layer, offering a tangy contrast to the sweet cherries. Full-fat cream cheese ensures a smooth, stable emulsion with the other ingredients; it’s what makes this recipe’s topping stand out. For a dairy-free alternative, use cashew-based cream cheese, which mimics the creaminess without compromising the luxurious texture.
Granulated sugar in the topping balances the cream cheese’s tang and sweetens the mixture evenly. Organic cane sugar provides a cleaner taste; it’s essential for the topping’s glossy finish. If watching sugar intake, substitute with monk fruit sweetener, adjusting quantities to maintain the right consistency for these easy Christmas bars.
Vanilla extract adds depth and warmth to the topping, enhancing the overall aroma of your Christmas desserts. Pure extract, not imitation, is vital for authentic flavor—extract it yourself from vanilla beans for the best results. In a pinch, almond extract can substitute, offering a nutty twist that complements the cherries beautifully.
Eggs in the topping act as a binder, helping it set into a firm yet creamy layer. Fresh, large eggs ensure the perfect custard-like texture; they’re crucial for the recipe’s reliability. For an egg-free version, use flax eggs (ground flaxseed mixed with water) to achieve a similar binding effect without altering the holiday cherry treats’ appeal.
Step-by-Step Instructions
Step 1: Preheating the Oven and Preparing the Dish
Start by preheating your oven to 350°F (175°C) and greasing a 9×13-inch baking dish with a light coating of butter or non-stick spray to ensure easy removal later. This step is crucial for even baking and prevents the bars from sticking.
Pro Tip: Use a kitchen thermometer to verify your oven’s temperature, as inaccuracies can lead to underbaked crusts—aim for spot-on 350°F for the best results in this Christmas cherry bars recipe.
Step 2: Mixing the Crust Ingredients
In a large mixing bowl, combine 2 cups of all-purpose flour, 1/2 cup of powdered sugar, and 1 cup of softened unsalted butter. Use a pastry cutter or your hands to mix until the mixture becomes crumbly and holds together when pressed.
Common Mistake to Avoid: Overworking the dough can make the crust tough; stop mixing as soon as it clumps to preserve that flaky texture in your cherry bars recipe.
Step 3: Pressing and Baking the Crust
Press the crumbly mixture evenly into the bottom of your prepared baking dish, using the back of a spoon or measuring cup for a flat surface. Bake for 15 minutes or until the crust is lightly golden, allowing it to set without over-browning.
Pro Tip: Lightly flour your hands before pressing to prevent sticking, ensuring a uniform crust that enhances the layers in these holiday cherry treats.
Step 4: Adding the Cherry Filling
Once the crust is out of the oven, spread 2 cans (21 ounces each) of cherry pie filling evenly over the top, making sure to cover the entire surface for balanced flavor in every bite.
Common Mistake to Avoid: Don’t let the filling sit too long before the next bake, as it could make the bars soggy—proceed immediately to maintain the ideal texture for your Christmas desserts.
Step 5: Preparing and Pouring the Topping
In a separate bowl, beat 1 package (8 ounces) of softened cream cheese, 1/2 cup of granulated sugar, 1 teaspoon of vanilla extract, and 2 eggs until the mixture is completely smooth and free of lumps. Pour this evenly over the cherry filling.
Pro Tip: Ensure all ingredients are at room temperature for a silky topping; this is the key to that irresistibly creamy finish in your easy Christmas bars.
Step 6: Final Baking and Cooling
Bake the assembled bars for 30-35 minutes or until the topping is set and no longer jiggles in the center. Allow the pan to cool completely on a wire rack before cutting into bars to prevent them from falling apart.
Common Mistake to Avoid: Cutting too soon can lead to messy slices; patience is key to achieving clean, professional-looking bars for your holiday cherry treats.
Serving & Presentation
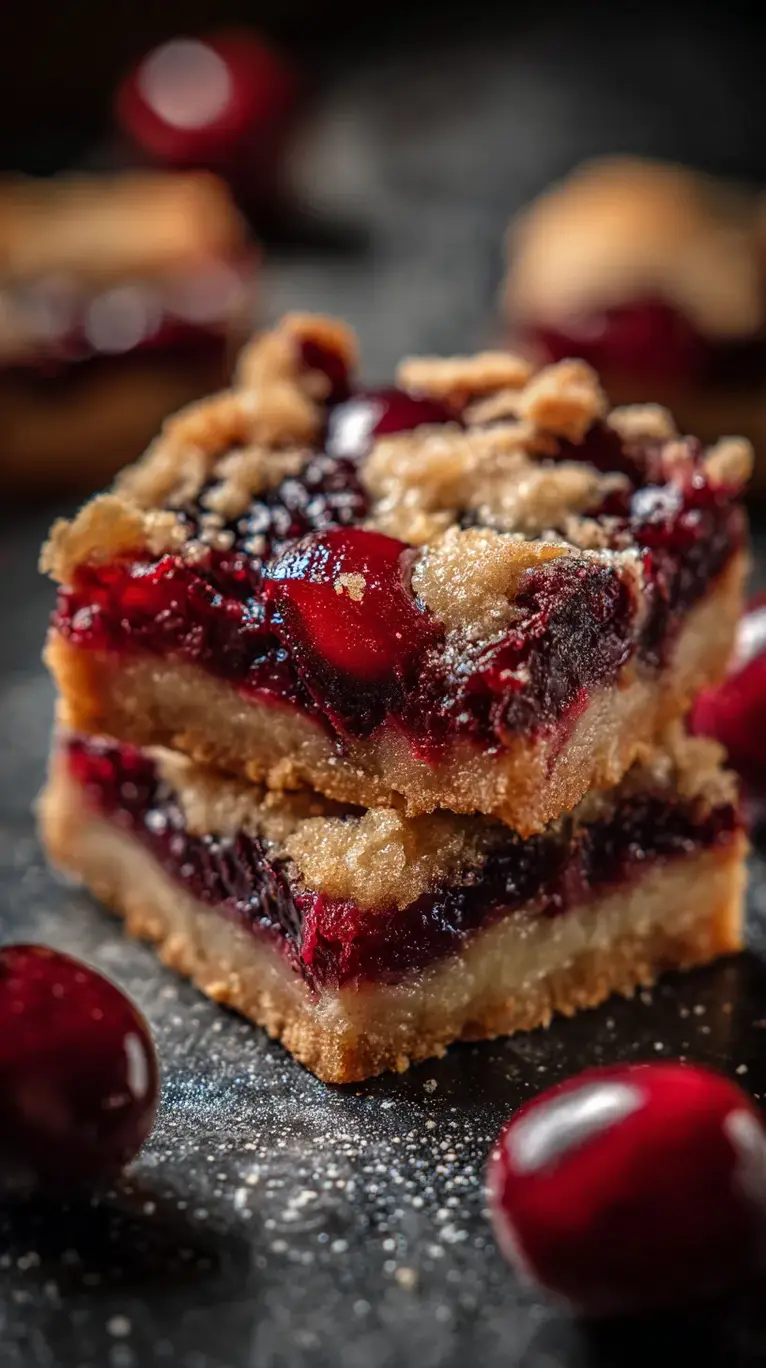
Elevate your Christmas cherry bars with creative plating by cutting them into neat squares and arranging on a festive platter lined with holiday-themed parchment paper. Garnish with a light dusting of powdered sugar or a few fresh mint leaves for a pop of color, enhancing the visual appeal without overwhelming the flavors. These bars pair wonderfully with hot cocoa or coffee during dessert spreads, or as a sweet complement to lighter main courses like roasted turkey or ham at your Christmas desserts table.
For an impressive presentation, stack the bars in a pyramid on a cake stand, allowing the cherry filling to peek through for a tantalizing effect. They also shine as part of a holiday cherry treats charcuterie board, alongside nuts, chocolates, and fruits, making them versatile for both casual gatherings and formal dinners. Remember, the key is in the portioning—serve one bar per person initially, as their rich, creamy profile makes them satisfying on their own.
Make-Ahead & Storage Solutions
For a make-ahead strategy, prepare the crust and filling up to 3 days in advance: bake the crust as directed, cool it, then layer with cherry filling and store covered in the refrigerator. Add the topping and bake fresh on the day of your event to maintain that irresistibly creamy texture, ensuring your Christmas cherry bars taste just-baked.
When storing leftovers, place the cooled bars in an airtight container in the refrigerator for up to 3 days; this preserves their moisture and prevents sogginess. For freezing, wrap individual bars in plastic wrap and store in a freezer-safe bag for up to 2 months—thaw in the fridge overnight before serving.
The best way to reheat is in a 300°F oven for 10-15 minutes to restore the original flaky crust and creamy topping without drying them out, making these easy Christmas bars perfect for impromptu holiday gatherings.
Frequently Asked Questions (FAQ)
Can I use fresh cherries instead of canned ones for Christmas cherry bars?
Yes, you can substitute fresh cherries for canned pie filling in this Christmas cherry bars recipe. Pit and chop about 4 cups of fresh cherries, then simmer them with 1/2 cup sugar and 2 tablespoons cornstarch until thickened to mimic the filling’s consistency. This swap adds a brighter, more tart flavor, ideal for holiday cherry treats, but note it may slightly alter the baking time—check for doneness after 25 minutes.
How long do Christmas cherry bars need to bake?
These Christmas cherry bars require a total baking time of 45-50 minutes: 15 minutes for the crust alone and 30-35 minutes after adding the filling and topping. Always bake until the topping is set and lightly golden, as oven variations can affect timing—use a toothpick test for accuracy in your cherry bars recipe.
What are some gluten-free alternatives for the crust in Christmas cherry bars?
For a gluten-free version, replace the all-purpose flour in the crust with a 1:1 gluten-free flour blend, such as one containing xanthan gum for better structure. Almond flour or oat flour can also work, but use a mix (e.g., 1 cup almond flour and 1 cup gluten-free blend) to maintain the crust’s texture. This ensures your Christmas desserts remain enjoyable for all, without compromising on that flaky base.
How far in advance can I make Christmas cherry bars for the holidays?
You can make Christmas cherry bars up to 3 days in advance by preparing and baking them fully, then storing in the refrigerator. For optimal freshness in your holiday cherry treats, assemble without the topping a day ahead and add it just before serving. Freezing baked bars for up to 2 months is also an option, allowing you to enjoy easy Christmas bars stress-free during the busy season.
Can I make this recipe vegan?
Absolutely, you can adapt this Christmas cherry bars recipe for a vegan diet by swapping the unsalted butter for a plant-based alternative like vegan butter, the cream cheese for cashew or coconut-based cream cheese, and the eggs for flax eggs (1 tablespoon ground flaxseed mixed with 3 tablespoons water per egg). These changes keep the irresistibly creamy topping intact while making it suitable for vegan holiday gatherings.
What variations can I try for this cherry bars recipe?
To vary this cherry bars recipe, experiment with adding spices like cinnamon or almond extract to the filling for a festive twist, or incorporate chopped nuts into the crust for extra crunch. For a healthier take, reduce sugar slightly or use a sugar substitute, ensuring your Christmas desserts remain versatile and personalized.
How do I know when the bars are fully baked?
The bars are fully baked when the topping is set and doesn’t jiggle in the center, typically after 30-35 minutes of second baking. Check with a gentle touch or a toothpick that comes out clean, avoiding overbaking to preserve the moist texture in your easy Christmas bars.
Tried This Recipe? Leave a Comment!
Did you make this recipe? I’d love to hear how it turned out! Please leave a comment and a rating below. Your feedback helps other home cooks and supports Delicetreats!
For more delicious inspiration, follow me on Pinterest!
Christmas Cherry Bars
- Total Time: 1 hour 10 minutes
- Yield: 24 bars 1x
Description
These festive Christmas Cherry Bars are a delightful treat with a buttery crust, sweet cherry filling, and a creamy topping. Perfect for holiday gatherings and easy to make ahead.
Ingredients
- For the crust:
- 2 cups all-purpose flour
- 1/2 cup powdered sugar
- 1 cup unsalted butter, softened
- For the filling:
- 2 (21 ounce) cans cherry pie filling
- For the topping:
- 1 (8 ounce) package cream cheese, softened
- 1/2 cup granulated sugar
- 1 teaspoon vanilla extract
- 2 eggs
Instructions
- Preheat oven to 350°F (175°C). Grease a 9×13-inch baking dish.
- In a bowl, mix flour, powdered sugar, and butter until crumbly. Press into the bottom of the prepared dish.
- Bake for 15 minutes or until lightly golden.
- Spread cherry pie filling evenly over the crust.
- In another bowl, beat cream cheese, sugar, vanilla, and eggs until smooth. Pour over cherry filling.
- Bake for 30-35 minutes or until set. Cool completely before cutting into bars.
Notes
Store in an airtight container in the refrigerator for up to 3 days. Can be frozen for up to 2 months.
- Prep Time: 20 minutes
- Cook Time: 50 minutes
- Method: Dessert
- Cuisine: American
Nutrition
- Calories: 250
- Sugar: 20g
- Fat: 12g
- Carbohydrates: 35g
- Protein: 3g