Table of Contents
Red Velvet Cheesecake Cake: The Only Recipe You’ll Ever Need
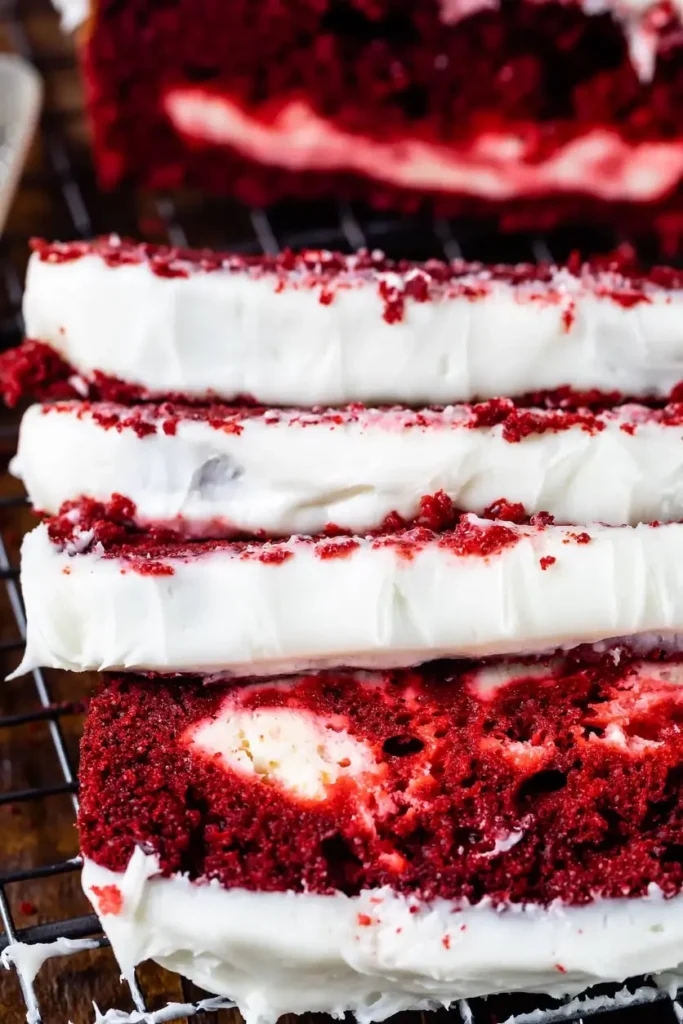
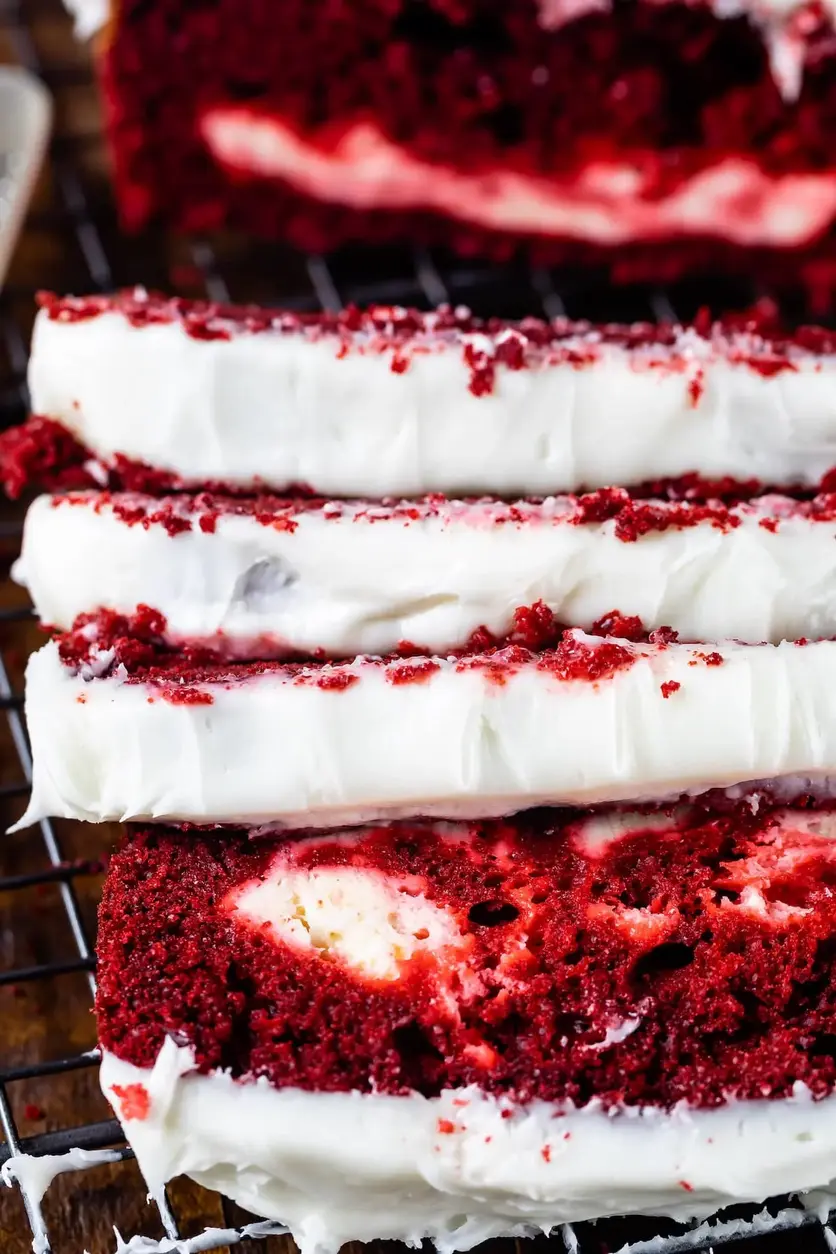
Imagine diving into a slice of the ultimate red velvet cheesecake cake, where the classic moist red velvet cake layers meet an ultra-creamy cheesecake filling that’s so irresistible, it elevates every special occasion. This red velvet cheesecake cake recipe from cookinwithlalyta.com solves the common dilemma of choosing between two beloved desserts by fusing them into one showstopping creation. With its vibrant red hue and velvety texture, this recipe stands out as the go-to for home bakers seeking perfection in every bite. Whether you’re celebrating a birthday or just treating yourself, this red velvet cheesecake cake delivers that wow factor with minimal fuss.
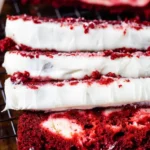
The sensory appeal of this red velvet cheesecake cake is unmatched—picture the tender, crumbly red velvet layers that give way to a luxuriously smooth and ultra-creamy cheesecake center, all enveloped in a tangy cream cheese frosting. Each bite bursts with a harmonious blend of subtle cocoa notes from the cake, balanced by the rich, tangy sweetness of the cheesecake filling. The aroma alone, as it bakes, fills your kitchen with hints of vanilla and chocolate, building anticipation for that first decadent forkful. Texturally, it’s a masterpiece: the cake’s moisture contrasts beautifully with the cheesecake’s silky smoothness, making it impossible to resist seconds.
What makes this red velvet cheesecake cake version from cookinwithlalyta.com truly special is the expertise of Chef Lalybeth, whose meticulous testing ensures foolproof results every time. You’ll learn insider tips, like the chef’s secret for achieving an ultra-creamy cheesecake layer that sets this recipe apart from ordinary ones online. By the end of this post, you’ll feel empowered to whip up this dessert with confidence, complete with serving ideas, storage hacks, and answers to your burning questions. Dive in and discover why this is the single best resource for mastering red velvet cheesecake cake at home.
Why This Red Velvet Cheesecake Cake Recipe is a Game-Changer
The Chef’s Secret: The standout feature of this red velvet cheesecake cake is the ultra-creamy cheesecake layer, achieved by ensuring all cream cheese ingredients are at room temperature and beaten to perfection. This technique incorporates air for a lighter, more luxurious texture that doesn’t crack or sink, setting it apart from typical recipes. By whisking the cream cheese mixture just until smooth without overmixing, we lock in that velvety consistency that makes every slice melt in your mouth.
Unbeatable Texture: Scientifically, the ultra-creamy result comes from the emulsion of fats in the cream cheese with the eggs and sugar, creating a stable structure that holds up when layered with the red velvet cake. The red velvet’s baking soda and vinegar reaction produces a moist, tender crumb that complements the cheesecake’s density, ensuring the cake doesn’t dry out during baking.
Foolproof for a Reason: This recipe has been tested multiple times in our kitchen to guarantee success, even for novice bakers. With precise measurements and step-by-step guidance, you’ll avoid common pitfalls like uneven baking, resulting in a consistently impressive red velvet cheesecake cake that wows every time.
Ingredient Spotlight: Quality Makes the Difference
For the red velvet cake, all-purpose flour serves as the foundation, providing structure and a light crumb. Opt for unbleached flour for better gluten development, which ensures your red velvet cheesecake cake rises evenly. If you’re substituting, use cake flour for a softer texture, but reduce the amount slightly to maintain consistency.
Granulated sugar in the red velvet cake adds sweetness and helps with browning, creating that iconic moist texture. Choose organic sugar to avoid additives; if needed, substitute with coconut sugar for a subtle caramel note, though it may alter the color slightly in your red velvet cheesecake cake.
Baking soda is crucial for the red velvet cake’s rise and tender crumb, reacting with vinegar for lift. Always use fresh baking soda to ensure proper activation; if substituting, baking powder can work in a pinch, but use half the amount to prevent over-rising in your red velvet cheesecake cake.
Salt enhances the flavors in the red velvet cake, balancing the sweetness and highlighting the cocoa. Use fine sea salt for even distribution; if you’re watching sodium, substitute with a potassium-based salt, but taste as you go to maintain the perfect balance in your red velvet cheesecake cake.
Cocoa powder in the red velvet cake adds a subtle chocolate undertone without overpowering the vanilla and red coloring. Go for Dutch-processed cocoa for a richer flavor; unsweetened cocoa is a direct substitute, but it might make your red velvet cheesecake cake slightly more tart.
Vegetable oil keeps the red velvet cake incredibly moist, contributing to its signature texture. Choose a neutral oil like canola; for a healthier twist, substitute with melted coconut oil, which adds a hint of tropical flavor to your red velvet cheesecake cake.
Buttermilk in the red velvet cake provides tanginess and acidity, reacting with baking soda for extra rise. Full-fat buttermilk yields the best results; if unavailable, make your own by adding vinegar to milk, ensuring it mimics the acidity for your red velvet cheesecake cake.
Eggs in the red velvet cake act as binders, adding richness and structure. Use large, room-temperature eggs for even incorporation; for an egg-free version, try a flaxseed mixture, though it may affect the texture of your red velvet cheesecake cake.
Red food coloring gives the vibrant hue to the red velvet cake. Opt for gel-based for intensity with less liquid; natural alternatives like beet juice can substitute, but they might dilute the batter slightly in your red velvet cheesecake cake.
Vanilla extract in the red velvet cake enhances overall flavor with warm notes. Always use pure extract for authenticity; artificial vanilla is a budget substitute, but it won’t deliver the same depth in your red velvet cheesecake cake.
White vinegar in the red velvet cake activates the baking soda for lift and tang. Apple cider vinegar works as a substitute with a milder flavor, ensuring your red velvet cheesecake cake still achieves that perfect rise.
For the cheesecake layer, cream cheese is the star, providing that ultra-creamy texture. Full-fat, brick-style cream cheese ensures smoothness; substitutes like Greek yogurt can be used for a tangier version, but drain it first to avoid excess moisture in your red velvet cheesecake cake.
In the cheesecake layer, granulated sugar sweetens and stabilizes; use superfine sugar for easier dissolving. A honey substitute adds moisture but can make the filling runnier, so adjust accordingly for your red velvet cheesecake cake.
Eggs in the cheesecake layer bind and set the filling; room-temperature eggs mix seamlessly. For vegan swaps, aquafaba or a commercial egg replacer can be used, though they may alter the firmness of your red velvet cheesecake cake.
For the cream cheese frosting, cream cheese delivers tang and creaminess; full-fat is key for spreadability. Cashew cream is a great dairy-free alternative, blended smooth for those avoiding lactose in your red velvet cheesecake cake.
Unsalted butter in the frosting adds richness and structure. European-style butter boosts flavor; for a vegan option, use plant-based butter sticks to maintain the frosting’s texture in your red velvet cheesecake cake.
Powdered sugar in the frosting provides sweetness and a smooth finish. Sift it to avoid lumps; a monk fruit sweetener blend can substitute for a low-carb version, ensuring your red velvet cheesecake cake remains deliciously frosted.
Step-by-Step Instructions
Step 1: Preparing the Oven and Pans
Preheat your oven to 350°F (175°C) and grease and flour two 9-inch round cake pans for the red velvet layers, plus a 9-inch springform pan for the cheesecake. This ensures even baking and easy removal. Mix thoroughly to coat every surface.
Pro Tip: Use parchment paper liners in the pans to prevent sticking and make flipping the cakes effortless, ensuring your red velvet cheesecake cake layers release perfectly.
Step 2: Creating the Red Velvet Cake Batter
In a large bowl, sift together 2 1/2 cups all-purpose flour, 1 1/2 cups granulated sugar, 1 teaspoon baking soda, 1 teaspoon salt, and 1 teaspoon cocoa powder until well combined and lump-free.
Common Mistake to Avoid: Don’t skip sifting, as clumps can lead to uneven texture; always sift to guarantee a smooth batter for your red velvet cheesecake cake.
Step 3: Mixing the Wet Ingredients
In another bowl, whisk together 1 1/2 cups vegetable oil, 1 cup buttermilk, 2 large eggs, 2 tablespoons red food coloring, 1 teaspoon vanilla extract, and 1 teaspoon white vinegar until fully blended.
Pro Tip: Ensure all wet ingredients are at room temperature to promote emulsification, which helps achieve that ultra-creamy integration in your red velvet cheesecake cake.
Step 4: Combining Batter
Add the wet ingredients to the dry ingredients and mix gently until just combined, avoiding overmixing to prevent a tough cake.
Common Mistake to Avoid: Overmixing activates gluten too much; stop as soon as the batter is uniform to keep your red velvet cheesecake cake moist and tender.
Step 5: Baking the Red Velvet Layers
Divide the batter evenly between the two prepared cake pans and bake for 25-30 minutes, or until a toothpick inserted in the center comes out clean. Allow to cool completely on a wire rack.
Pro Tip: Rotate the pans halfway through baking for even heat distribution, ensuring both layers of your red velvet cheesecake cake bake uniformly.
Step 6: Preparing the Cheesecake Layer
In a mixing bowl, beat 16 ounces of softened cream cheese and 1/2 cup granulated sugar until smooth, then add 2 large eggs and 1 teaspoon vanilla extract, mixing until just combined.
Common Mistake to Avoid: Overbeating the cheesecake mixture incorporates too much air, causing cracks; mix on low speed to maintain that ultra-creamy texture.
Step 7: Baking the Cheesecake Layer
Pour the cheesecake batter into the greased 9-inch springform pan and bake at 325°F (163°C) for 40-45 minutes, until the edges are set but the center is slightly jiggly. Cool completely.
Pro Tip: Bake in a water bath by placing the pan in a larger dish with hot water to prevent cracking and enhance the ultra-creamy consistency.
Step 8: Assembling the Cake
Place one cooled red velvet layer on a plate, top with the cooled cheesecake layer, then add the second red velvet layer on top.
Common Mistake to Avoid: Ensure all components are fully cooled before assembling to avoid melting the layers and compromising the structure of your red velvet cheesecake cake.
Step 9: Frosting the Cake
In a bowl, beat 8 ounces softened cream cheese and 1/2 cup softened unsalted butter until creamy, then gradually add 4 cups powdered sugar and 1 teaspoon vanilla extract, frosting the entire cake smoothly.
Pro Tip: Chill the frosted cake for at least 2 hours as directed to set the layers and enhance the flavors of your red velvet cheesecake cake.
Serving & Presentation
For an impressive presentation of your red velvet cheesecake cake, slice it neatly with a warm knife for clean cuts that showcase the striking layers. Garnish with fresh berries or a dusting of powdered sugar to add visual appeal and a burst of tartness that complements the sweetness. Serve on a elegant cake stand to make it the centerpiece of your dessert table, pairing perfectly with a scoop of vanilla ice cream for contrast or a cup of coffee to balance the richness.
Make-Ahead & Storage Solutions
Make-Ahead Strategy: Prepare the red velvet layers and cheesecake up to 3 days in advance by baking, cooling, and wrapping them tightly in plastic wrap before refrigerating. Assemble and frost on the day of serving to keep the ultra-creamy texture intact.
Storing Leftovers: Store any remaining red velvet cheesecake cake in an airtight container in the refrigerator for up to 5 days to maintain freshness; for longer storage, freeze individual slices wrapped in foil for up to 2 months.
The Best Way to Reheat: Thaw frozen slices in the refrigerator overnight, then bring to room temperature for about 30 minutes before serving to restore the original moistness and ultra-creamy consistency without sogginess.
Frequently Asked Questions (FAQ)
How do you make a red velvet cheesecake cake from scratch?
To make a red velvet cheesecake cake from scratch, start by preheating your oven and preparing the pans as outlined. Mix the dry ingredients for the red velvet cake, combine with wet ingredients, bake the layers, prepare and bake the cheesecake, then assemble and frost. Follow our step-by-step instructions for the best results, ensuring an ultra-creamy filling that makes this red velvet cheesecake cake exceptional.
What can I substitute for cream cheese in a red velvet cheesecake cake?
For cream cheese in a red velvet cheesecake cake, you can use alternatives like full-fat Greek yogurt or mascarpone for a similar tangy flavor, but drain the yogurt first to avoid excess moisture. For dairy-free options, cashew cream or vegan cream cheese works well, though it may slightly alter the ultra-creamy texture—adjust by adding a bit more thickener if needed.
How long does it take to bake a red velvet cheesecake cake?
Baking a red velvet cheesecake cake typically takes about 1 hour total, with the red velvet layers baking for 25-30 minutes at 350°F and the cheesecake layer for 40-45 minutes at 325°F. Factor in cooling and assembly time for the full 2-hour process, ensuring everything sets properly for that perfect red velvet cheesecake cake.
What are the best ways to serve and store a red velvet cheesecake cake?
The best ways to serve a red velvet cheesecake cake include chilling it for at least 2 hours to enhance flavors, then slicing with a warm knife for neat portions. Pair with coffee or berries for contrast. For storage, refrigerate leftovers in an airtight container for up to 5 days or freeze for up to 2 months, reheating gently to preserve the ultra-creamy texture.
Can this red velvet cheesecake cake be made ahead of time?
Yes, you can make components of this red velvet cheesecake cake ahead; bake the layers and cheesecake up to 3 days in advance, store them wrapped in the fridge, and assemble just before serving to keep the ultra-creamy filling fresh and prevent sogginess.
Is red velvet cheesecake cake suitable for dietary restrictions?
This red velvet cheesecake cake can be adapted for dietary needs; for gluten-free, swap all-purpose flour with a gluten-free blend, and for vegan, use plant-based milk, eggs, and cream cheese alternatives, though you may need to test for the best ultra-creamy results.
What variations can I try with this red velvet cheesecake cake recipe?
Experiment with variations like adding chocolate chips to the red velvet layers or incorporating lemon zest into the cheesecake for a twist, ensuring you maintain the balance to keep your red velvet cheesecake cake’s signature ultra-creamy appeal.
Tried This Recipe? Leave a Comment!
Did you make this recipe? I’d love to hear how it turned out! Please leave a comment and a rating below. Your feedback helps other home cooks and supports cookinwithlalyta!
For more delicious inspiration, follow me on Pinterest!
Red Velvet Cheesecake Cake
- Total Time: 2 hours
- Yield: 12 1x
Description
A decadent fusion of moist red velvet cake and creamy cheesecake layers, perfect for special occasions.
Ingredients
- For the Red Velvet Cake:
- 2 1/2 cups all-purpose flour
- 1 1/2 cups granulated sugar
- 1 teaspoon baking soda
- 1 teaspoon salt
- 1 teaspoon cocoa powder
- 1 1/2 cups vegetable oil
- 1 cup buttermilk, room temperature
- 2 large eggs, room temperature
- 2 tablespoons red food coloring
- 1 teaspoon vanilla extract
- 1 teaspoon white vinegar
- For the Cheesecake Layer:
- 16 ounces cream cheese, softened
- 1/2 cup granulated sugar
- 2 large eggs
- 1 teaspoon vanilla extract
- For the Cream Cheese Frosting:
- 8 ounces cream cheese, softened
- 1/2 cup unsalted butter, softened
- 4 cups powdered sugar
- 1 teaspoon vanilla extract
Instructions
- Preheat oven to 350°F (175°C). Grease and flour two 9-inch round cake pans.
- For the red velvet cake: In a large bowl, sift together flour, sugar, baking soda, salt, and cocoa powder.
- In another bowl, whisk together oil, buttermilk, eggs, food coloring, vanilla, and vinegar.
- Add wet ingredients to dry ingredients and mix until just combined.
- Divide the batter evenly between the two prepared pans and bake for 25-30 minutes, or until a toothpick inserted comes out clean.
- For the cheesecake layer: In a mixing bowl, beat cream cheese and sugar until smooth. Add eggs and vanilla, and mix until combined.
- Pour cheesecake batter into a greased 9-inch springform pan and bake at 325°F (163°C) for 40-45 minutes.
- Allow both cakes and cheesecake to cool completely.
- To assemble: Place one red velvet layer on a plate, top with cheesecake layer, then the second red velvet layer.
- Frost the entire cake with cream cheese frosting and refrigerate for at least 2 hours before serving.
Notes
Ensure all ingredients are at room temperature for best results. Store leftovers in the refrigerator for up to 5 days.
- Prep Time: 45 minutes
- Cook Time: 1 hour
- Method: Dessert
- Cuisine: American
Nutrition
- Calories: 650
- Sugar: 55g
- Fat: 35g
- Carbohydrates: 75g
- Protein: 10g
Conclusion
This Red Velvet Cheesecake Cake offers a decadent blend of moist, cocoa-rich red velvet layers and smooth, creamy cheesecake, making it the perfect showstopper for special occasions like Valentine’s Day. The vibrant red color and tangy cream cheese frosting create a flavor profile that’s both indulgent and nostalgic, sure to impress your guests. For a serving tip, chill the cake for a few hours before slicing to enhance its texture, or try a variation by incorporating white chocolate chips for added sweetness. If you’re craving more red velvet treats, check out our Flawless Red Velvet Crinkle Cookies, and for another delightful cheesecake option, explore the Fluffy Raspberry Pistachio Cheesecake Recipe to mix things up with fruity flavors.