Table of Contents
Luscious Red Velvet Oreo Cake: The Only Recipe You’ll Ever Need
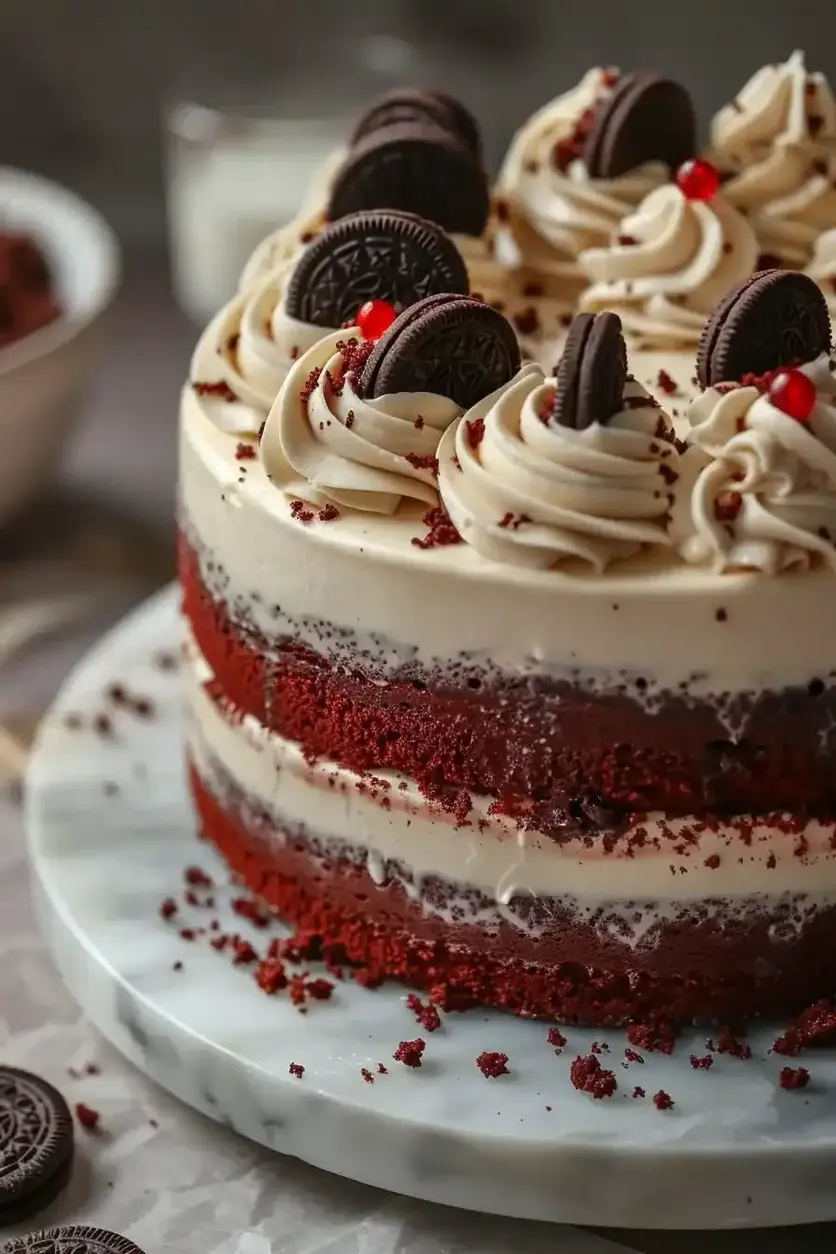
Imagine hosting a family gathering where everyone’s craving something indulgent yet unforgettable—enter the Luscious Red Velvet Oreo Cake, a showstopper that combines classic red velvet’s velvety richness with an irresistibly moist Oreo twist. As a home baker, you know how disappointing dry cakes can be, but this recipe, crafted by Chef Lalybeth, solves that with finely crushed Oreos that lock in moisture and deliver a crave-worthy crunch in every bite. Within the first few steps, you’ll discover why this Luscious Red Velvet Oreo Cake stands out as the ultimate dessert for celebrations, boasting a perfect balance of tangy cream cheese frosting and chocolatey depth that elevates your baking game effortlessly.
Picture the deep red layers, soft as silk with a tender crumb that melts in your mouth, contrasted by the subtle snap of Oreo pieces that add an unexpected texture. The aroma of baking this Luscious Red Velvet Oreo Cake fills your kitchen with warm, cocoa-infused scents mixed with a hint of vanilla, creating an inviting atmosphere that draws everyone in. Each slice reveals a harmonious blend of flavors: the slight tang from buttermilk, the richness of chocolate from cocoa and Oreos, and a creamy frosting that ties it all together, making this red velvet Oreo cake recipe a sensory delight that’s as visually stunning as it is delicious.
What makes this Luscious Red Velvet Oreo Cake from cookinwithlalyta.com the single best resource online is Chef Lalybeth’s years of expertise, ensuring every detail is foolproof and tested for home cooks. You’ll learn insider tips, like the “Chef’s Secret” for achieving that unbeatable moisture, plus step-by-step guidance that builds your confidence in the kitchen. Dive into our comprehensive guide, from ingredient spotlights to FAQs, and discover how this moist red velvet Oreo cake can become your go-to for parties, with variations for dietary needs and storage hacks that keep it fresh—truly, it’s more than a recipe; it’s a baking triumph.
Why This Luscious Red Velvet Oreo Cake Recipe is a Game-Changer
The Chef’s Secret: The unique angle here is the “Irresistibly Moist Oreo Twist,” achieved by folding in finely crushed Oreos into the batter. This not only infuses the cake with extra chocolatey flavor and a delightful crunch but also helps retain moisture through the Oreos’ creamy filling, preventing the cake from drying out during baking. Unlike traditional red velvet recipes, this method ensures a bakery-level texture that’s tender and flavorful, making your Luscious Red Velvet Oreo Cake stand out at any event.
Unbeatable Texture: The science behind this texture lies in the combination of buttermilk and vegetable oil, which create a chemical reaction with the baking soda and vinegar for a rise that’s perfectly airy yet dense. The crushed Oreos act as moisture retainers, distributing fat evenly to avoid toughness, resulting in a Luscious Red Velvet Oreo Cake that’s spongy and rich without being overly heavy.
Foolproof for a Reason: This recipe has been tested multiple times in our kitchens to guarantee success, even for novice bakers. With precise measurements and clear instructions, you’ll avoid common pitfalls, ensuring your Luscious Red Velvet Oreo Cake turns out perfectly every time, making it a reliable favorite for red velvet Oreo cake enthusiasts.
Ingredient Spotlight: Quality Makes the Difference
All-Purpose Flour (2 1/2 cups): This forms the base of your Luscious Red Velvet Oreo Cake, providing structure and a light crumb. Opt for unbleached flour for better gluten development, which ensures a tender texture. If you’re out, substitute with cake flour for a softer result, but reduce the amount slightly to avoid a dense cake.
Granulated Sugar (1 1/2 cups): Sugar sweetens the batter and aids in browning, giving your red velvet Oreo cake its signature color and moisture. Use organic cane sugar for a purer taste; it’s less processed. For a lower-calorie option, swap with coconut sugar, but note it may slightly alter the flavor profile.
Cocoa Powder (1 teaspoon): This adds the essential chocolatey depth to your Luscious Red Velvet Oreo Cake without overpowering the Oreo twist. Choose high-quality, unsweetened cocoa for rich flavor; Dutch-processed works best for a smoother taste. If unavailable, natural cocoa is a fine substitute, though it might make the cake slightly more acidic.
Vegetable Oil (1 1/2 cups): Key for moisture in this recipe, it keeps your red velvet Oreo cake irresistibly soft. Use a neutral oil like canola for consistent results; for a healthier twist, substitute with melted coconut oil, ensuring it’s at room temperature to blend seamlessly.
Buttermilk (1 cup): This ingredient tenderizes the cake and reacts with baking soda for lift, contributing to the moist texture of your Luscious Red Velvet Oreo Cake. Fresh buttermilk is ideal for its tang; if substituting, mix regular milk with a tablespoon of lemon juice or vinegar for a similar effect.
Eggs (2 large): Eggs bind the ingredients and add richness, enhancing the Oreo twist’s creaminess. Always use large, fresh eggs; for vegan versions, replace with flax eggs (1 tablespoon flaxseed meal mixed with 3 tablespoons water per egg) to maintain structure.
Red Food Coloring (2 tablespoons): It gives the cake its vibrant hue, making your Luscious Red Velvet Oreo Cake visually appealing. For natural alternatives, use beet juice powder to avoid artificial dyes, though it may lighten the color slightly.
Vanilla Extract (1 teaspoon): This enhances the overall flavor, balancing the chocolate and Oreo notes. Pure vanilla extract is best for authenticity; imitate versions lack depth, so substitute with almond extract for a nutty variation if desired.
White Distilled Vinegar (1 teaspoon): It activates the baking soda for rise and tang, crucial for the moist red velvet Oreo cake texture. Apple cider vinegar works as a substitute, offering a milder flavor without compromising the reaction.
Oreo Cookies (20 crushed for batter, plus additional for garnish): These provide the irresistible moist Oreo twist, adding crunch and chocolate flavor. Use original Oreos for the best taste; for a gluten-free option, swap with gluten-free chocolate sandwich cookies, ensuring they’re finely crushed for even distribution.
Step-by-Step Instructions
Step 1: Preheat the Oven and Prepare the Pans
Start by preheating your oven to 350°F (175°C) and generously grease two 9-inch round cake pans with butter or a non-stick spray. This ensures the cake releases easily without sticking. Combine the dry ingredients in a large bowl as per the next step to streamline your process.
Pro Tip: Use parchment paper liners for the pans to prevent any edge sticking and achieve a clean release, which helps maintain the cake’s perfect shape for your Luscious Red Velvet Oreo Cake.
Step 2: Sift the Dry Ingredients
In a large bowl, sift together the 2 1/2 cups all-purpose flour, 1 1/2 cups granulated sugar, 1 teaspoon baking soda, 1 teaspoon salt, and 1 teaspoon cocoa powder. Sifting removes lumps and aerates the mixture, leading to a lighter batter.
Common Mistake to Avoid: Don’t skip sifting, as clumps can result in an uneven texture; always use a fine-mesh sieve to ensure your Luscious Red Velvet Oreo Cake has a smooth, professional finish.
Step 3: Whisk the Wet Ingredients
In another bowl, whisk together the 1 1/2 cups vegetable oil, 1 cup buttermilk, 2 large eggs, 2 tablespoons red food coloring, 1 teaspoon vanilla extract, and 1 teaspoon white distilled vinegar until fully combined and smooth.
Pro Tip: Bring all wet ingredients to room temperature before whisking to ensure they emulsify properly, enhancing the moisture in your red velvet Oreo cake recipe.
Step 4: Combine Wet and Dry Mixtures and Add Oreos
Gently combine the wet ingredients with the dry ones, mixing just until blended to avoid overworking the batter, which can make the cake tough. Then, fold in the 20 crushed Oreo cookies for that irresistible moist twist.
Common Mistake to Avoid: Overmixing at this stage can deflate the batter; fold in the Oreos with a spatula using a light hand to preserve the air pockets and achieve the perfect texture for your Luscious Red Velvet Oreo Cake.
Step 5: Pour and Bake the Batter
Divide the batter evenly between the prepared pans and smooth the tops. Bake in the preheated oven for 25-30 minutes, or until a toothpick inserted into the center comes out clean.
Pro Tip: Rotate the pans halfway through baking for even cooking, ensuring your Luscious Red Velvet Oreo Cake bakes uniformly without any domed tops.
Step 6: Cool the Cakes
Remove the cakes from the oven and let them cool in the pans for 10 minutes. Then, transfer them to a wire rack to cool completely, which prevents sogginess and maintains the Oreo crunch.
Common Mistake to Avoid: Rushing the cooling process can cause the cakes to break; always use a wire rack for proper air circulation in your red velvet Oreo cake.
Step 7: Frost and Garnish
Once cooled, frost the cakes with cream cheese frosting, layering them as desired, and top with additional crushed Oreo cookies for a finishing touch that enhances the moist red velvet Oreo cake’s appeal.
Pro Tip: Chill the frosted cake in the fridge for 15 minutes before serving to set the frosting, making your Luscious Red Velvet Oreo Cake easier to slice and more impressive.
Serving & Presentation
For an eye-catching presentation, stack the layers of your Luscious Red Velvet Oreo Cake on a decorative cake stand and pipe swirls of cream cheese frosting around the edges. Garnish with whole or crushed Oreos for a crunchy contrast, and add edible flowers or red sprinkles for a festive vibe. This red velvet Oreo cake pairs beautifully with fresh berries or a scoop of vanilla ice cream, balancing its richness, and complements main courses like a light salad or grilled chicken at parties for a delightful dessert transition.
Make-Ahead & Storage Solutions
Make-Ahead Strategy: Prepare the batter up to 2 days in advance and store it covered in the fridge; bake fresh when needed. You can also bake the cakes ahead, wrap them tightly in plastic, and refrigerate for up to 3 days before frosting.
Storing Leftovers: Keep any remaining Luscious Red Velvet Oreo Cake in an airtight container at room temperature for up to 2 days, or refrigerate for up to 5 days to maintain moisture. For longer storage, freeze individual slices wrapped in foil for up to 3 months.
The Best Way to Reheat: Thaw frozen slices in the fridge overnight, then warm in a 300°F oven for 10 minutes to restore the original texture and Oreo crunch without drying out your red velvet Oreo cake.
Frequently Asked Questions (FAQ)
How long does it take to bake a Luscious Red Velvet Oreo Cake?
Baking this Luscious Red Velvet Oreo Cake takes about 25-30 minutes in a preheated 350°F oven, depending on your oven’s accuracy. Always check for doneness with a toothpick; if it comes out clean, your cake is ready. This step is crucial for achieving that irresistibly moist texture.
What can I substitute for Oreos in a Red Velvet Cake recipe?
For a substitute in your Luscious Red Velvet Oreo Cake, try using chocolate sandwich cookies like gluten-free versions or even homemade chocolate wafers for a similar crunch. If you want to mimic the cream filling’s effect, add a tablespoon of cream cheese to the batter, but ensure the cookies are finely crushed to maintain the moist red velvet cake’s even distribution and texture.
What are some tips for making a moist Luscious Red Velvet Oreo Cake?
To ensure your Luscious Red Velvet Oreo Cake stays moist, use room-temperature ingredients for better blending, don’t overmix the batter to preserve air pockets, and incorporate the crushed Oreos carefully. Additionally, avoid overbaking by checking early with a toothpick; storing it properly post-baking also helps retain moisture.
How should I serve a Luscious Red Velvet Oreo Cake for a party?
For serving your Luscious Red Velvet Oreo Cake at a party, slice it just before guests arrive to keep it fresh, and pair it with coffee or milk for contrast. Present on a tiered stand for visual appeal, and consider adding personalized touches like custom Oreo garnishes to make it a memorable centerpiece for your event.
Can this recipe be made ahead of time?
Yes, you can make components of this Luscious Red Velvet Oreo Cake ahead; bake the layers up to 3 days in advance and store them wrapped in the fridge, then frost on the day of serving to keep the Oreo twist fresh and moist.
What dietary variations can I make to this red velvet Oreo cake?
For dietary needs, make this Luscious Red Velvet Oreo Cake gluten-free by using a 1:1 gluten-free flour blend and gluten-free Oreos, or vegan by swapping eggs with flax eggs and buttermilk with a plant-based alternative like almond milk mixed with vinegar.
Tried This Recipe? Leave a Comment!
Did you make this recipe? I’d love to hear how it turned out! Please leave a comment and a rating below. Your feedback helps other home cooks and supports cookinwithlalyta!
For more delicious inspiration, follow me on Pinterest!

Luscious Red Velvet Oreo Cake
- Total Time: 50 minutes
- Yield: 12 1x
Description
A decadent red velvet cake layered with crushed Oreo cookies, offering a moist texture and rich chocolate flavor with a cream cheese frosting.
Ingredients
- 2 1/2 cups all-purpose flour
- 1 1/2 cups granulated sugar
- 1 teaspoon baking soda
- 1 teaspoon salt
- 1 teaspoon cocoa powder
- 1 1/2 cups vegetable oil
- 1 cup buttermilk
- 2 large eggs
- 2 tablespoons red food coloring
- 1 teaspoon vanilla extract
- 1 teaspoon white distilled vinegar
- 20 Oreo cookies, crushed for batter
- Additional Oreo cookies for garnish
Instructions
- Preheat the oven to 350°F (175°C) and grease two 9-inch round cake pans.
- In a large bowl, sift together flour, sugar, baking soda, salt, and cocoa powder.
- In another bowl, whisk oil, buttermilk, eggs, food coloring, vanilla, and vinegar.
- Combine wet and dry ingredients, mixing until just blended, then fold in crushed Oreos.
- Pour batter into prepared pans and bake for 25-30 minutes, or until a toothpick comes out clean.
- Cool cakes in pans for 10 minutes, then transfer to a wire rack to cool completely.
- Frost with cream cheese frosting and top with additional crushed Oreos.
Notes
Ensure Oreos are finely crushed for even distribution; store in an airtight container for up to 3 days.
- Prep Time: 20 minutes
- Cook Time: 30 minutes
- Method: Dessert
- Cuisine: American
Nutrition
- Calories: 450
- Sugar: 35g
- Fat: 22g
- Carbohydrates: 55g
- Protein: 5g
Conclusion
In conclusion, this Luscious Red Velvet Oreo Cake delivers a perfect harmony of rich, velvety chocolate flavors with the irresistible crunch of Oreos, making it an ideal dessert for celebrations or indulgent treats. Whether you’re baking for a special occasion or a casual gathering, its moist layers and creamy frosting are sure to impress your guests. For more Oreo-inspired delights, try the Decadent Oreo Fudge Quick Recipe or the Best Creamy Oreo Milkshake Recipe, and if you enjoy chocolate cakes, don’t miss the Ultimate Moist Chocolate Cake Recipe for another crowd-pleaser.