Table of Contents
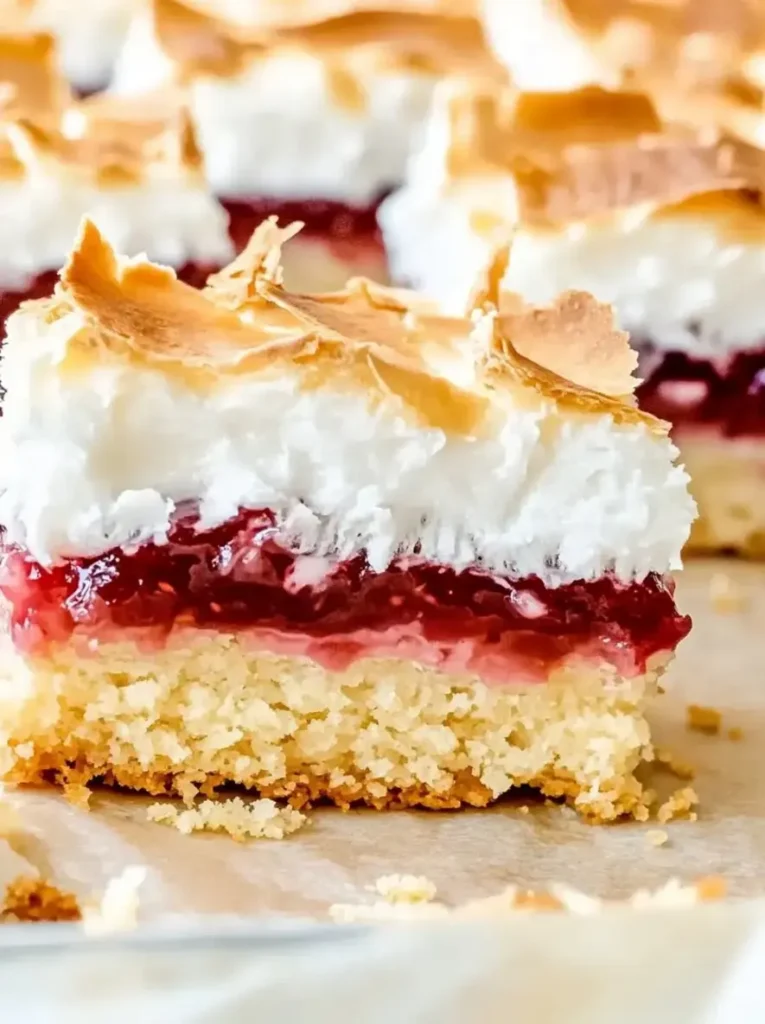
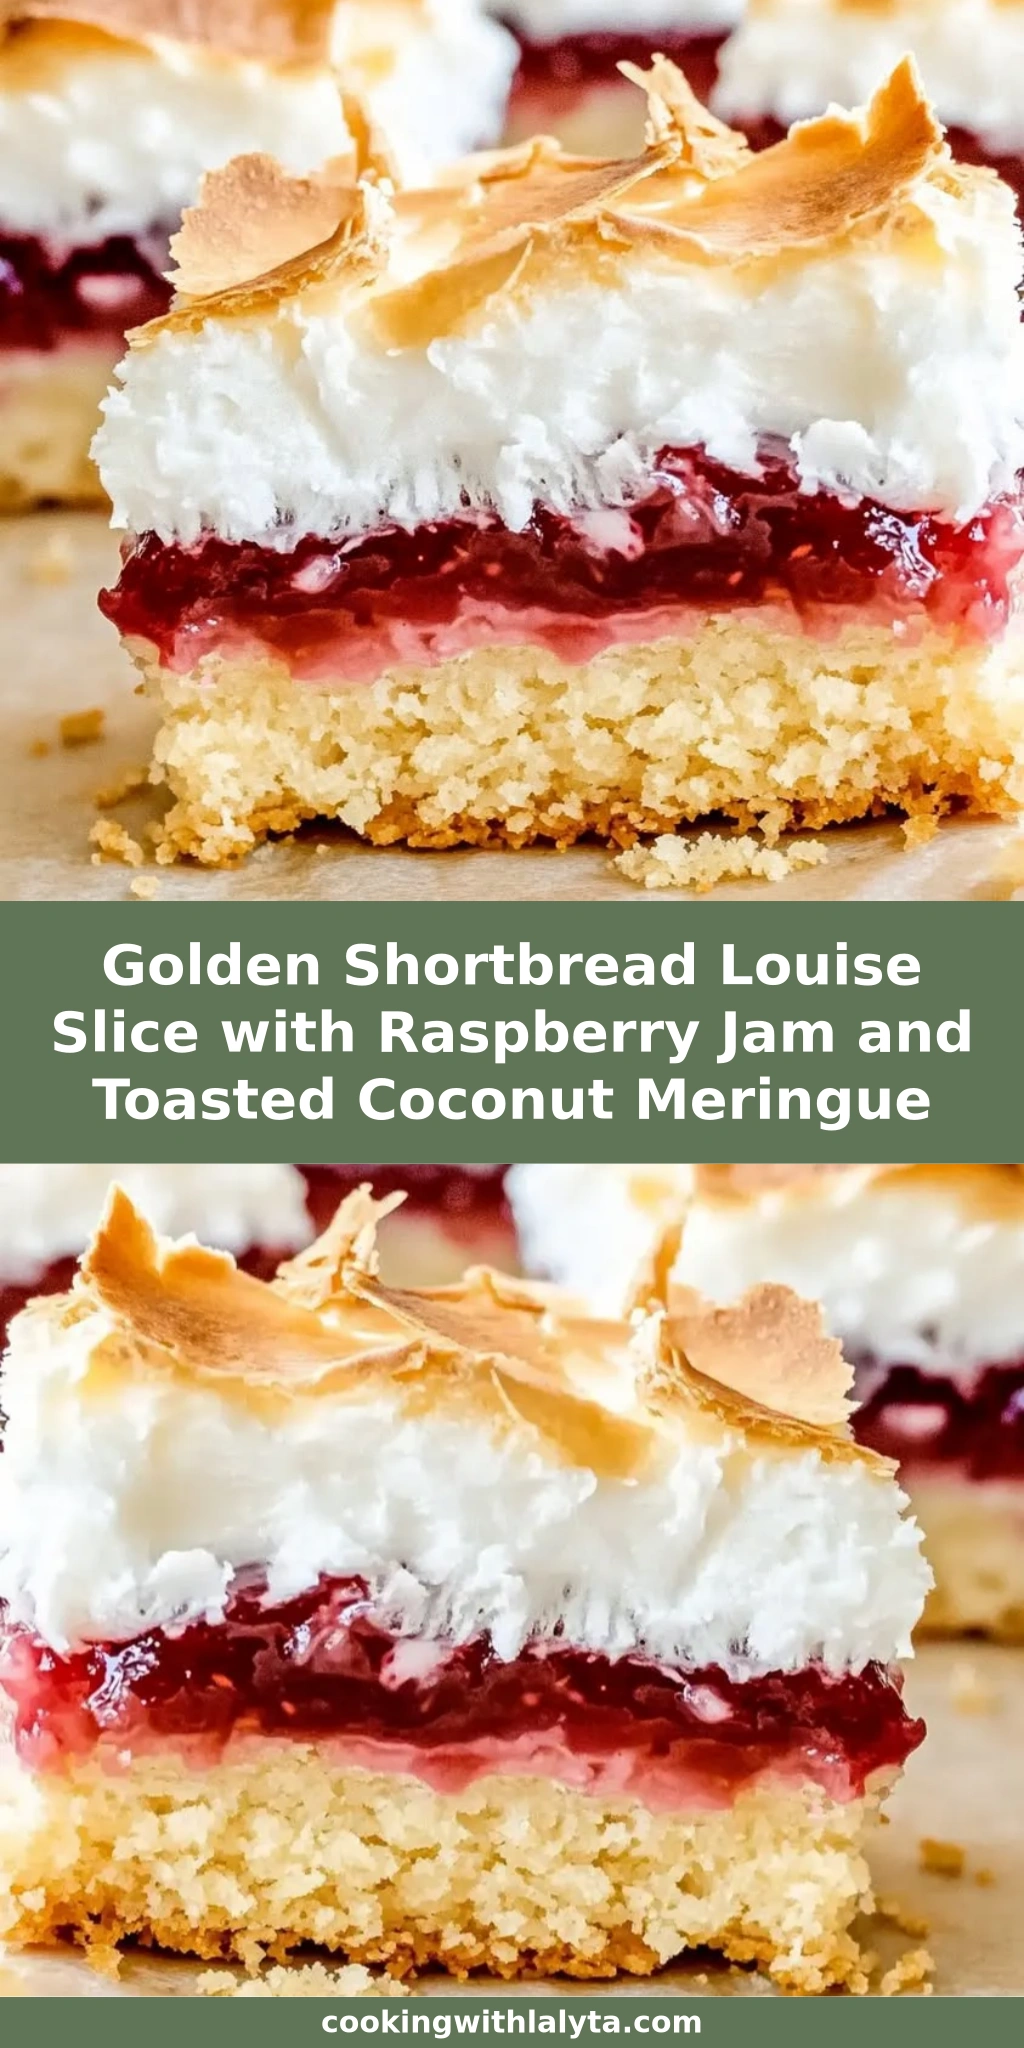
Golden Shortbread Louise Slice with Raspberry Jam and Toasted Coconut Meringue: A Buttery, Jammy, Cloud-Topped Classic
The first time I baked a Louise slice recipe was in my tiny New York apartment kitchen, the late‑summer light slanting through the window as I toasted coconut for the top. That unmistakable nutty aroma transported me straight back to my mother’s kitchen in Morocco, where we’d warm shredded coconut in a dry skillet for our holiday pastries. Here in NYC, I’ve come to adore this New Zealand classic — a golden shortbread Louise slice layered with jewel‑red raspberry jam and crowned with a cloud‑like toasted coconut meringue that’s at once crisp, chewy, and utterly irresistible. It’s the kind of slice that makes your afternoon tea feel like a celebration.
Imagine sinking your fork through a whisper‑thin crackle of meringue into a fragrant, buttery shortbread base that practically melts on your tongue, then meeting the bright, tangy punch of raspberry jam — slightly seedy, just sweet enough, and glistening like stained glass. The coconut isn’t just there for show; toasting it beforehand unlocks deep, toasty oils that mingle with the vanilla‑scented meringue, creating a topping that tastes both familiar and surprising. I learned the art of meringue during my patisserie training in Paris, where precision reigns supreme: egg whites at room temperature, sugar added slowly, peaks so stiff you can hold the bowl upside down. That discipline makes all the difference between a weepy topping and this wonderfully pillowy‑crisp crown.
My version of this raspberry jam coconut slice stands apart because of a few small but mighty tweaks: I bloom the salt directly into the butter for a more even distribution, I use a generous layer of good‑quality raspberry jam (the kind with real fruit bits), and I toast the coconut just until the first hint of gold — never beyond. You’ll also find my best‑kept shortcut to avoid the dreaded soggy bottom: a brief pre‑bake and a fork‑prick technique that seals the base before the jam ever touches it. As we go through each step, I’ll share my Paris‑honed pro tip for luscious meringue and warn you about the one mistake even seasoned bakers make when folding in the coconut. Get ready for a slice that will brighten your dessert table and earn you every “can I have the recipe?” request.
Why This Golden Shortbread Louise Slice Recipe Is the Best
The Flavor Secret. Growing up in Morocco, desserts always starred bright fruit preserves and toasty nuts, so this Louise slice felt like a warm reunion the moment I tried it. What makes mine stand out? I lean into that Moroccan‑inspired love of deep caramel notes by toasting the coconut until it’s fragrant and just shy of golden — it brings a rich, almost‑butterscotch nuance to the meringue that elevates the entire slice. A whisper of salt in the shortbread wakes up every layer, and I reach for a raspberry jam with real tang, not just sweetness, because that contrast is everything. My Paris training taught me how to build flavor in layers, and that philosophy shines through in every forkful of this coconut meringue slice.
Perfected Texture. Texture is where this recipe really sings. The shortbread base is meticulously balanced — firm enough to support two layers without crumbling into dust, yet so tender it dissolves in your mouth. I use the French technique of “creaming” until the butter and sugar are truly light and airy, which gives the crust lift without any leavening. The meringue, again, is a lesson from my Paris days: beat the egg whites to stiff peaks before adding sugar in a slow, steady stream — no grittiness, just glossy perfection. When you fold in that toasted coconut, you’re not just adding flavor; you’re ensuring the meringue stays stable during baking, resulting in a crisp outer shell and a marshmallowy interior. The jam sits in between like a fruity gel, never bleeding into the dough.
Foolproof & Fast. Even if you’ve never made a classic New Zealand slice before, I’ve structured this golden shortbread Louise slice recipe to be almost fail‑proof. The steps are clearly broken down, the temperatures are tested in a home oven (my cozy NYC galley kitchen is proof!), and I’ve woven in pro tips and common mistakes at every critical junction. You don’t need a stand mixer — a handheld beater works beautifully. From start to finish, you’re looking at about an hour, most of it hands‑off baking time. Kids love helping spread the jam, and the magical puff of meringue in the oven makes it a showstopper to pull out. I promise: once you nail this shortbread slice with raspberry jam, it’ll become your go‑to dessert for potlucks, tea parties, and those evenings when you just need a cheerful slice of sweetness.
Louise Slice Recipe Ingredients
Many of these ingredients I can find right at my local Union Square Greenmarket — beautiful Amish butter, local eggs that yield the silkiest meringue, and jewel‑toned raspberry jars from upstate farms. When I stock up, I always grab an extra bag of desiccated coconut because I toast it fresh for this slice; the scent fills the whole apartment and reminds me of the bubbling sugar‑and‑nut carts in the Marrakech souk my mother used to take me to. You probably have everything else in your pantry — let’s gather it all up.
Ingredients List
- For the shortbread base: 1 cup (225g) unsalted butter, softened
- 1/2 cup (100g) granulated sugar
- 2 cups (250g) all-purpose flour
- 1/4 teaspoon salt
- For the filling: 1/2 cup (160g) raspberry jam
- For the coconut meringue topping: 2 large egg whites, at room temperature
- 1 cup (200g) granulated sugar
- 1 cup (80g) desiccated coconut, toasted
Ingredient Spotlight
Unsalted Butter. Using European‑style unsalted butter (like Plugrá or Kerrygold) gives the shortbread a richer flavor and slightly flakier crumb because of the higher fat content. In a pinch, regular unsalted butter works beautifully. If you need dairy‑free, I’ve tested a plant‑based butter stick and the base holds together well, though the browned‑butter notes will be missing.
Raspberry Jam. A quality seedless or low‑seed raspberry jam is key for that tangy‑sweet layer. I love Bonne Maman or a local farmer’s market preserve. Avoid jelly — it’s too wobbly and can seep into the base. You can substitute with seedless strawberry or apricot preserves; the slice will be sweeter, so I’d reduce the meringue sugar by 2 tablespoons to keep the balance.
Desiccated Coconut. Look for unsweetened desiccated coconut (fine shreds) in the baking aisle — it toasts more evenly than sweetened, large flakes. Toast it in a dry skillet over medium heat, stirring constantly, until barely golden and fragrant, about 3–5 minutes. Unsweetened shredded coconut works, but pulse it briefly in a food processor for a finer texture. Sweetened flaked coconut will burn faster and make the slice overly sweet.
Egg Whites. The meringue demands room‑temperature whites — I take mine out of the fridge 30 minutes before starting. Fresh eggs give the best volume. If you forget, submerge the whole eggs in a bowl of warm (not hot) water for 10 minutes. No good substitution exists for egg whites in this meringue, but if you need an egg‑free topping, try whipped aquafaba with the same sugar ratio – the meringue will be slightly softer but still delicious.
| Original Ingredient | Best Substitution | Flavor / Texture Impact |
|---|---|---|
| Unsalted butter | Plant-based butter stick (e.g., Earth Balance) | Shortbread will be slightly less flaky, but still buttery tasting; works well. |
| Raspberry jam | Apricot preserve or strawberry jam (seedless) | Sweeter and milder; reduce meringue sugar by 2 Tbsp to avoid cloying. |
| All-purpose flour | 1:1 gluten-free baking flour (with xanthan gum) | Shortbread will be slightly more crumbly; press firmly into tin. |
| Desiccated coconut | Unsweetened shredded coconut, pulsed finer | Texture slightly chewier; toast a minute longer for golden color. |
| Granulated sugar (shortbread) | Coconut sugar (half quantity) | Deeper caramel notes, darker color; base will be denser. |
How to Make Golden Shortbread Louise Slice – Step-by-Step
I’m going to guide you through this Louise slice recipe as if we were side by side in my kitchen, with the oven humming and a bowl of ruby jam waiting. Don’t rush — each layer builds on the last, and you’ll see those distinct stripes come together like a beautiful edible painting.
Step 1: Preheat Oven and Prepare Tin
Preheat your oven to 180°C (350°F). Line a 20x20cm (8×8 inch) baking tin with parchment paper, allowing a bit of overhang so you can lift the slice out later. I like to give the parchment a light mist of cooking spray to keep the shortbread from sticking.
💡 Lalybeth’s Pro Tip: Crumple the parchment into a ball first, then smooth it into the tin — it conforms to the corners more easily and reduces slipping.
Step 2: Cream Butter and Sugar
In a large bowl, use a hand mixer (my trusty stand mixer makes this even easier) to cream the softened butter and granulated sugar together until the mixture is pale, light, and fluffy — about 2–3 minutes. Scrape down the sides of the bowl once to make sure no butter pockets remain. This step aerates the dough and gives you that classic shortbread melt‑in‑the‑mouth texture.
⚠️ Common Mistake to Avoid: Don’t use melted butter. Melted butter will make the shortbread dense and greasy instead of tender and crumbly. The butter should be truly softened but still cool to the touch.
Step 3: Mix Dry Ingredients
Sift the flour and salt directly into the creamed butter mixture. Sifting isn’t just for show — it removes lumps and keeps the dough from over‑mixing. Fold everything together with a rubber spatula or mix on the lowest speed just until a soft, cohesive dough forms. Stop as soon as no dry flour streaks remain.
💡 Lalybeth’s Pro Tip: If the dough feels too crumbly to press, add 1–2 teaspoons of ice‑cold water and work it in gently. The dough should hold together when squeezed but not be sticky.
Step 4: Press and Prick Base
Transfer the dough into the prepared tin. Using your fingertips or the bottom of a measuring cup, press it into an even layer, making sure to fill the corners. Then, take a fork and prick the entire surface — this prevents the base from puffing up and creates tiny channels that help it bake evenly.
Step 5: Bake Shortbread
Bake the shortbread base in the preheated oven for 15 minutes, or until it’s lightly golden around the edges and just set in the middle. The top should be dry to the touch with no wet dough visible. Remove from the oven and let it cool on a wire rack for about 5 minutes — you want it warm but not piping hot when you spread the jam.
⚠️ Common Mistake to Avoid: Baking the base until it’s deep golden can make it too hard after the second bake. We want a pale‑golden hue, because it will continue to cook when the meringue goes on top.
Step 6: Spread Jam
Spoon the raspberry jam onto the warm shortbread and use the back of a spoon or an offset spatula to spread it evenly, reaching right to the edges. A warm base helps the jam melt into a glassy layer that stays put. Don’t skimp — the jam is the fruity heartbeat of this slice.
💡 Lalybeth’s Pro Tip: If your jam is very chunky, warm it briefly in a saucepan with a splash of water to loosen it, then strain out large seeds. This prevents tearing the delicate meringue later.
Step 7: Whip Egg Whites
In a completely clean, grease‑free bowl (wipe it and the beaters with a little lemon juice or vinegar if you want to be sure), beat the egg whites until stiff peaks form. Start on medium speed and increase gradually. The peaks should stand straight up when you lift the beaters. Now, while continuing to beat, add the sugar a tablespoon at a time, waiting until each addition dissolves before adding more. You’ll end up with a thick, glossy meringue that holds its shape.
⚠️ Common Mistake to Avoid: Adding sugar too quickly can cause a gritty meringue. Patience is key. Rub a tiny bit between your fingers — if you feel sugar grains, keep beating.
Step 8: Fold in Toasted Coconut
Gently fold the toasted desiccated coconut into the meringue using a large metal spoon or a rubber spatula. Use a “cut‑and‑fold” motion to keep as much air as possible. You’ll see the meringue turn flecked with golden threads; fold just until evenly combined. Over‑folding will deflate all those precious bubbles, and we want that pillowy loft in the oven.
💡 Lalybeth’s Pro Tip: Toast the coconut to a very light golden shade only — it will darken further in the oven. Keep it moving in the skillet; one distracted minute can turn it into bitter, burnt gravel.
Step 9: Top with Meringue
Spoon the coconut meringue onto the jam layer in dollops, then gently spread it to cover the jam completely, all the way to the edges. Use a light touch — don’t push down or you’ll mix meringue into the jam. A palette knife dipped in warm water glides over the top beautifully. Aim for soft, swooping peaks for a rustic look.
Step 10: Final Bake
Return the tin to the oven and bake for another 15–20 minutes, until the meringue is puffed and deeply golden on top. The peaks should look toasted and crisp. The whole kitchen will smell like caramelized coconut — pure bliss. If the meringue begins to brown too fast, loosely tent a piece of foil over it for the last few minutes.
⚠️ Common Mistake to Avoid: Opening the oven door too early in the meringue bake can cause it to collapse. Rely on your oven light and peek only at the 15‑minute mark.
Step 11: Cool and Cut
Remove the slice from the oven and let it cool completely in the tin on a wire rack — at least 1 hour at room temperature. I know it smells irresistible, but warm meringue is delicate and will tear. Once cooled, use the parchment handles to lift the whole slab out. Place it on a cutting board and slice into 16 neat bars using a sharp, serrated knife.
💡 Lalybeth’s Pro Tip: For ultra‑clean cuts (and to avoid cracks), refrigerate the slice for 30 minutes before cutting. Wipe the knife between slices with a damp cloth.
| Step | Action | Duration | Key Visual Cue |
|---|---|---|---|
| 1 | Preheat oven, line tin | 5 min | Parchment overhang |
| 2 | Cream butter and sugar | 3 min | Pale and fluffy |
| 3 | Sift flour & salt, mix | 2 min | Soft dough forms |
| 4 | Press & prick base | 2 min | Even layer, fork marks |
| 5 | Bake shortbread | 15 min | Lightly golden edges |
| 6 | Spread raspberry jam | 2 min | Even, glossy layer |
| 7 | Whip egg whites & sugar | 8 min | Stiff, glossy peaks |
| 8 | Fold in toasted coconut | 1 min | Evenly distributed flecks |
| 9 | Spread meringue | 2 min | Covered completely, peaks |
| 10 | Final bake | 15–20 min | Golden, crisp meringue |
| 11 | Cool completely & cut | 1 hour + | Firm to touch, clean slices |
Serving & Presentation
In my NYC home, I serve these golden shortbread Louise slices on a simple white platter — the contrast makes the crimson jam and toasted‑coconut top pop like a bakery window display. Dust them with a whisper of powdered sugar just before bringing them to the table; it settles into the meringue’s crevices like a fresh snowfall. I love to arrange them in a slightly overlapping row, tucking a few edible pansies or mint leaves here and there for a little splash of color that Mother would have adored back in Morocco.
Pair a slice with a steaming cup of Earl Grey or a bold espresso — the citrus notes in the tea echo the jam’s brightness, while coffee grounds the sweetness. For a proper afternoon tea, I’ll offer a small dish of whipped crème fraîche on the side and some fresh raspberries. When I’m feeling indulgent, a tiny drizzle of melted dark chocolate over the meringue makes this slice feel Paris‑worthy, recalling the delicate pâtisserie windows I’d gaze into as a student.
| Pairing Type | Suggestions | Why It Works |
|---|---|---|
| Side Dish | Fresh berries, lemon‑scented whipped cream | Fresh fruit brightens the richness; cream softens the crisp meringue. |
| Sauce / Dip | Warm raspberry coulis, vanilla custard | Echoes the jam layer; custard adds a creamy counterpoint. |
| Beverage | Earl Grey tea, flat white coffee, late‑harvest riesling | Tea lifts the fruit; coffee balances sweetness; wine’s acidity cuts through. |
| Garnish | Fresh mint, edible rose petals, toasted coconut flakes | Add color and a hint of freshness; extra crunch from coconut. |
Make-Ahead, Storage & Reheating
Between recipe testing, blog photos, and spontaneous get‑togethers, I’m always looking for smart storage solutions. This Louise slice keeps beautifully, making it a dream for meal‑prep or holiday baking. I’ll often bake a tray on Sunday, then pack individual bars for my husband’s lunchbox all week. The shortbread softens slightly over time, but the meringue stays crisp on top, especially if you store it correctly.
| Method | Container | Duration | Reheating Tip |
|---|---|---|---|
| Room Temperature | Airtight container, layers separated by parchment | Up to 3 days | Not needed; enjoy straight from the container. |
| Refrigerator | Airtight container with parchment between layers | Up to 1 week | Re‑crisp in a 150°C (300°F) oven for 5–7 minutes. |
| Freezer | Wrap individual slices in plastic wrap, then foil; place in a freezer bag | Up to 3 months | Thaw overnight in the fridge; re‑crisp as above. |
| Make‑Ahead | Bake entire slice, cool completely, store uncut in tin | 2 days in advance | Cut just before serving; the meringue stays crisper intact. |
A quick reheat in the oven works wonders for reviving that crunchy meringue shell. I’ll pop a couple of slices on a baking sheet and let them warm for a few minutes while I brew tea. If you’re short on time, a 30‑second zap in the microwave will soften the meringue slightly, but the texture turns more chewy than crisp — still tasty, just different. Whatever you do, never store the slice in a damp environment (like next to fresh fruit) because the meringue will absorb moisture and become sticky. Trust me, I learned that the hard way during a particularly humid New York summer!
Variations & Easy Swaps
| Variation | Key Change | Best For | Difficulty Impact |
|---|---|---|---|
| Classic Raspberry‑Coconut | Swap jam flavor | Traditionalists; kids love it | No change |
| Gluten‑Free Louise Slice | Use 1:1 GF flour blend | Gluten‑sensitive guests | Slightly more crumbly |
| Lemon‑Coconut Twist | Replace jam with lemon curd | Bright, citrusy dessert lovers | No change |
Classic Raspberry-Coconut Variation
Stay true to the original but play with different jam flavors — a blackberry or boysenberry jam deepens the fruitiness, while an apricot preserve brings a honeyed golden hue that reminds me of the quince jams my mother would jar in Morocco. Just be mindful of the sugar levels; if you’re using a very sweet jam, reduce the meringue sugar by 1–2 tablespoons. I also like to fold a teaspoon of finely grated lemon zest into the meringue to cut through the sweetness — a little trick I picked up in a Parisian bakery where coconut and citrus were constant bedfellows.
Gluten-Free Louise Slice
When my gluten‑free friends come over, I swap the all‑purpose flour with a high‑quality 1:1 gluten‑free baking flour that contains xanthan gum (Bob’s Red Mill works wonderfully). The shortbread will be a touch more delicate — press it very firmly into the tin and consider adding an extra 5 minutes to the blind bake to help it set. I’ve also found that the dough can feel slightly stickier, so I dust my hands with a little extra flour when pressing it in. The trade‑off? You still get that buttery crumb and the meringue remains gloriously unchanged, so no one feels left out.
Lemon-Coconut Twist
One spring day at the Union Square Greenmarket, I spotted the most fragrant Meyer lemons and thought, “Why not?” I swapped the raspberry jam for a generous layer of homemade lemon curd (store‑bought works too — look for a thick, spreadable one). The result is a bright, sunshine‑in‑a‑bite Louise slice. The tart curd plays beautifully against the sweet, nutty coconut meringue, and a dusting of lemon zest on top makes it look as fresh as a Parisian pâtisserie window. This variation is especially dreamy with a cup of chamomile tea.
Frequently Asked Questions
How do you keep the shortbread base from getting soggy when adding raspberry jam?
The key is to pre‑bake the shortbread just until lightly golden and to prick the dough thoroughly with a fork before baking — those tiny holes allow steam to escape and create a more resistant surface. Let the base cool for about 5 minutes after baking so it sets slightly, then spread the jam evenly while it’s still warm but not hot. A high‑quality, thick raspberry jam (not a watery jelly) also helps; if yours seems runny, simmer it for a minute to reduce. As long as you follow the bake time and don’t add extra liquid to the jam, your base will stay crisp and buttery.
Can I use a different type of jam or fruit preserve in Louise slice?
Absolutely, and I encourage you to experiment! Strawberry, apricot, blackberry, or even a tart plum preserve all work wonderfully. Just keep in mind that sweeter jams will shift the balance slightly — I recommend reducing the sugar in the meringue by about 2 tablespoons if your preserve is very sweet. Thicker, spreadable preserves hold their layer better; if using a thinner fruit spread, I like to warm it briefly and let it cool so it sets firmer. A personal favorite from my Moroccan pantry is a fig preserve, though its earthy flavor pairs best with a little orange zest in the meringue.
What is the best way to toast coconut for a meringue topping without burning it?
I toast coconut in a dry, heavy‑bottomed skillet over medium heat, stirring or tossing constantly with a wooden spoon. The coconut goes from pale to golden in less than 3 minutes, so never walk away. Remove it from the pan as soon as it’s fragrant and just a shade golden — it will continue to darken off the heat. You can also spread it on a baking sheet and bake at 160°C (325°F) for 5–7 minutes, stirring halfway. The subtle, toasty flavor it imparts is worth the vigilance, and once you’ve mastered it, you’ll use the technique in granola and curries too.
How long should I let the Louise slice cool before cutting into bars?
Patience here makes all the difference. Allow the slice to cool completely in the tin on a wire rack — this takes at least 1 hour. For the cleanest cuts, I pop the cooled slab (still in the tin) into the fridge for 30 minutes to firm up the meringue and jam. Use a sharp serrated knife, wiping it with a damp cloth between cuts. Warm meringue will tear and squish, so resist the urge to slice early. Your reward will be pristine bars with crisp edges and a picture‑perfect layered cross‑section.
What is the origin of the Louise slice recipe?
The Louise slice is a beloved classic from New Zealand, where it’s been a bake‑sale staple for generations. The story goes that it was named after a home cook named Louise, though no one can agree on which Louise — it’s as if the recipe came together out of a collective love for pantry ingredients. The combination of a shortbread base, a bright jam layer, and a coconut‑meringue topping feels both humble and elegant, reflecting the country’s fondness for simple, honest baking. I love that a recipe with such an ordinary name can taste so extraordinary.
Can I make this Louise slice gluten‑free?
Yes, and it’s easier than you might think. Replace the all‑purpose flour with a 1:1 gluten‑free flour blend that contains xanthan gum. The shortbread dough will feel slightly crumblier, so press it very firmly into the tin and consider chilling it for 10 minutes before the first bake to help it hold together. I’ve tested this with Bob’s Red Mill and King Arthur blends; both give a tender, buttery base. The meringue and jam layers are naturally gluten‑free, so you don’t have to change a thing there. Just be sure your jam and coconut are also certified GF if cross‑contamination is a concern.
Why is my meringue weeping or collapsing?
A weepy meringue usually points to one of three issues: under‑beating the egg whites, adding sugar too quickly, or heat shock. Make sure your egg whites are at room temperature and your bowl is squeaky clean and grease‑free. Beat to stiff peaks before adding sugar, then add it a tablespoon at a time, fully incorporating each addition. During baking, don’t open the oven door for at least 15 minutes, as a sudden temperature drop can cause the meringue to shrink. On humid days, try adding 1/8 teaspoon of cream of tartar to stabilize the whites — a trick I perfected in Paris’ damp winter kitchens.
Can I freeze Louise slice?
Definitely — I often freeze half the batch for later. Wrap individual bars or the whole uncut slab tightly in plastic wrap, then a layer of foil, and slide into a freezer bag. Frozen Louise slice keeps well for up to 3 months. Thaw overnight in the refrigerator while still wrapped to prevent condensation, then unwrap and pop into a 150°C (300°F) oven for 5–7 minutes to re‑crisp the meringue. The shortbread softens slightly after freezing, but that oven refresh brings back the crunch beautifully.
How do I get really clean, bakery‑style cuts?
Chill the entire cooled slice in the refrigerator for at least 30 minutes, then use a long, sharp serrated knife. I run the knife under hot water, dry it quickly, and make one decisive cut through the meringue and base. Wipe the blade clean after each slice — the jam will gather on it otherwise. A gentle sawing motion, rather than pressing straight down, prevents cracks in the meringue. After cutting, I like to trim off the very edges for an ultra‑polished look (and honestly, cook’s treat right there!).
Share Your Version!
I’d adore seeing your golden shortbread Louise slice creations. Whether you stayed true to the raspberry‑coconut classic or put your own spin on the jam or the meringue, your kitchen is an extension of mine. Did you try the lemon curd twist? Did you discover a small‑batch fig jam that knocked your socks off? I’m always on the lookout for new flavor pairings, and your stories make this little corner of the internet feel like a global family table.
Snap a photo before those slices disappear (trust me, they will!), and tag me on Instagram or Pinterest at @cookingwithlalyta. If you’d be so kind, pop a star rating and a comment below — it helps other home cooks find this Louise slice recipe and gives me the biggest smile. I read every single one. So tell me: what’s your favorite jam to tuck inside a buttery shortbread? I can’t wait to hear.
From my NYC kitchen to yours — I hope this recipe brings as much warmth to your table as it does to mine. — Lalybeth 🧡
Love This Recipe? Save It to Pinterest!
If you enjoyed this Golden Shortbread Louise Slice with Raspberry Jam and Toasted Coconut Meringue recipe, don’t let it get lost in your browser tabs! 😄 Pin it now so you can find it again anytime — and explore hundreds more tried-and-tested recipes waiting for you on my Pinterest boards.
👉 Follow Lalybeth on Pinterest @cookingwithlalyta
📌 Pin this recipe · 🔁 Re-pin your favorites · 💬 Tag me when you make it — I love seeing your creations!
Golden Shortbread Louise Slice with Raspberry Jam and Toasted Coconut Meringue
- Total Time: 55 minutes
- Yield: 16 slices 1x
Description
A classic New Zealand slice with a buttery shortbread base, tangy raspberry jam, and a toasted coconut meringue topping.
Ingredients
- For the shortbread base: 1 cup (225g) unsalted butter, softened
- 1/2 cup (100g) granulated sugar
- 2 cups (250g) all-purpose flour
- 1/4 teaspoon salt
- For the filling: 1/2 cup (160g) raspberry jam
- For the coconut meringue topping: 2 large egg whites
- 1 cup (200g) granulated sugar
- 1 cup (80g) desiccated coconut, toasted
Instructions
- Preheat oven to 180°C (350°F). Line a 20x20cm baking tin with parchment paper.
- In a large bowl, cream together the softened butter and sugar until light and fluffy.
- Sift in the flour and salt, then mix until a soft dough forms.
- Press the dough evenly into the prepared tin. Prick with a fork.
- Bake for 15 minutes or until lightly golden. Remove from oven and let cool slightly.
- Spread the raspberry jam evenly over the shortbread base.
- In a clean bowl, beat the egg whites until stiff peaks form. Gradually add the sugar, beating well after each addition, until thick and glossy.
- Fold in the toasted desiccated coconut.
- Spoon the meringue over the jam layer, spreading gently to cover completely.
- Return to the oven and bake for 15–20 minutes, until the meringue is golden and crisp.
- Allow to cool completely in the tin before cutting into slices.
Notes
For best results, use fresh raspberry jam and toast the coconut lightly before folding into the meringue.
- Prep Time: 20 minutes
- Cook Time: 35 minutes
- Method: Dessert
- Cuisine: New Zealand
Nutrition
- Calories: 280 kcal
- Sugar: 24 g
- Fat: 14 g
- Carbohydrates: 38 g
- Protein: 3 g
Tried This Recipe? Leave a Comment!
Did you make this recipe? I’d love to hear how it turned out! Please leave a comment and a rating below. Your feedback helps other home cooks and supports cookingwithlalyta.com!
For more delicious inspiration, follow me on Pinterest!