Table of Contents
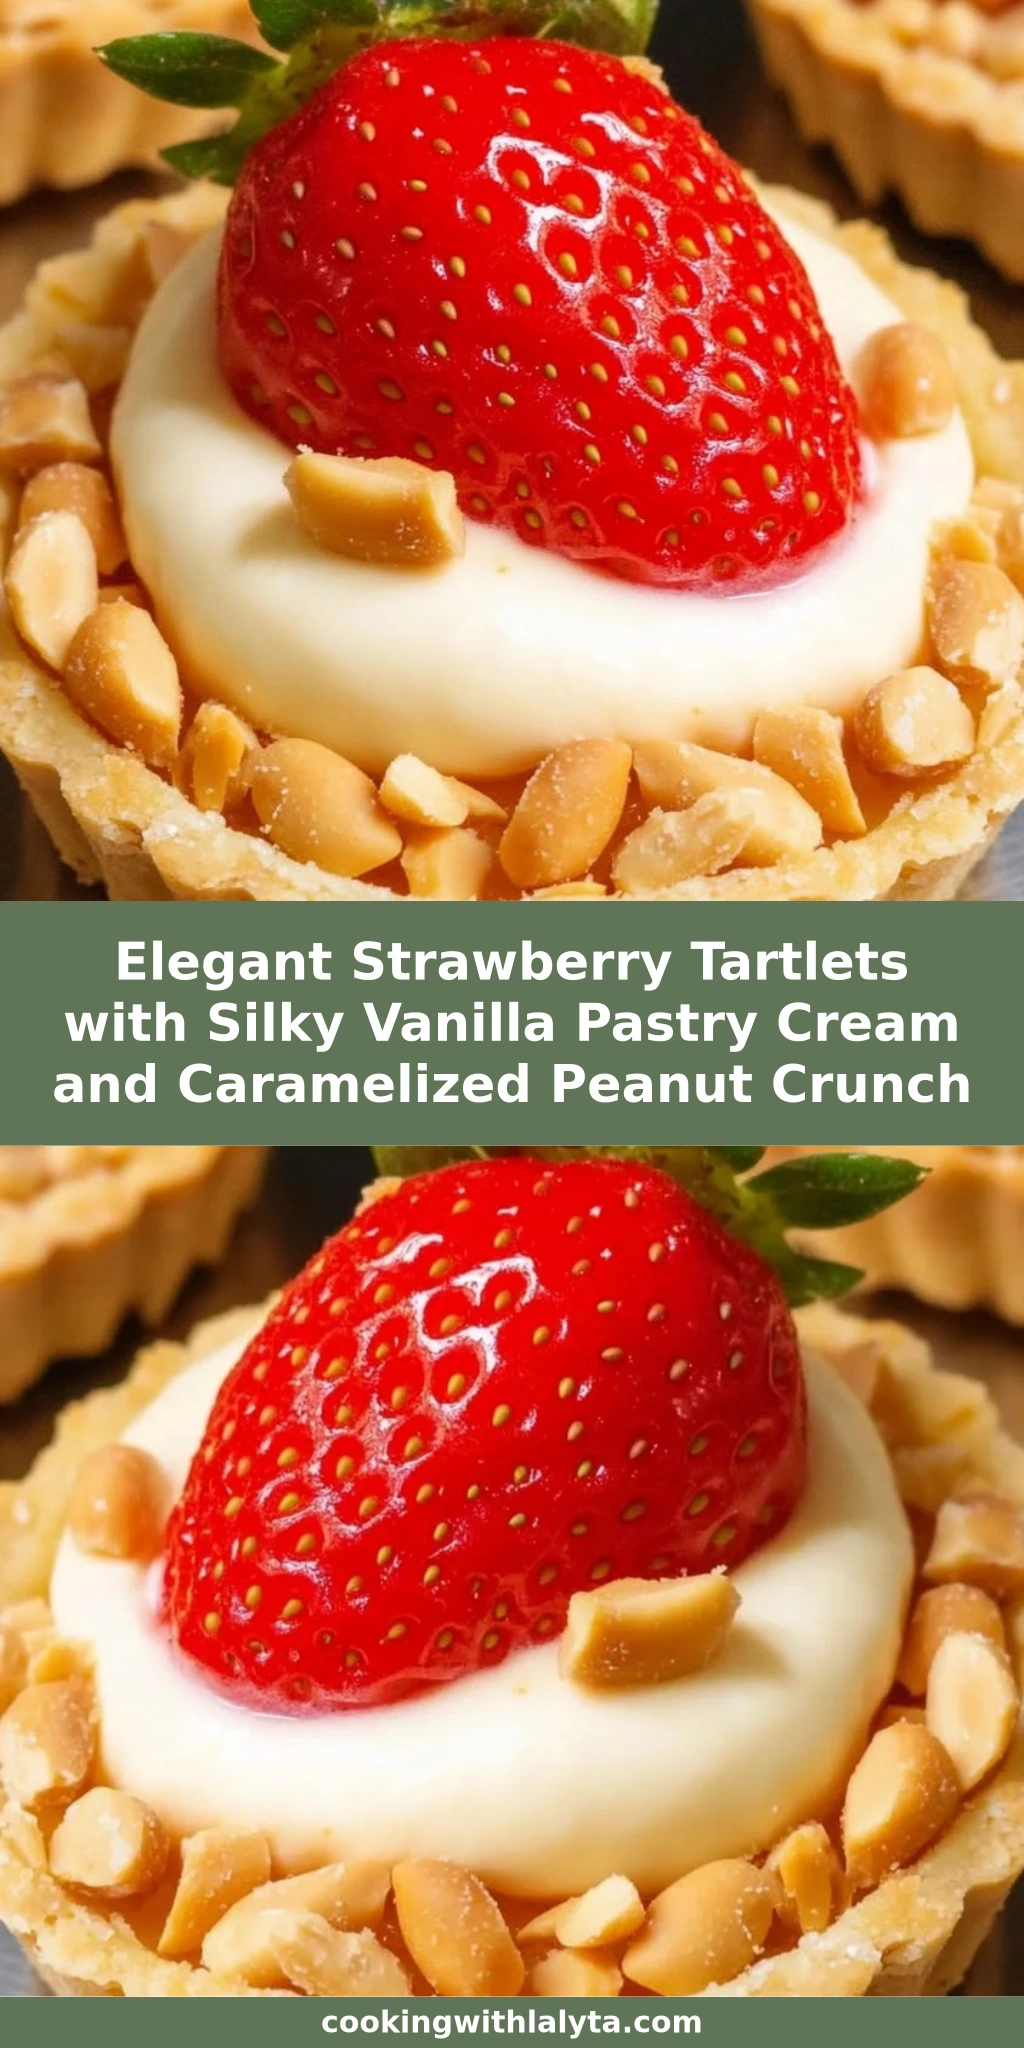
Elegant Strawberry Tartlets with Silky Vanilla Pastry Cream and Caramelized Peanut Crunch – A Crunchy-Twist on Classic French Tartlets
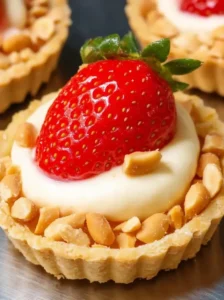
I still remember the intoxicating scent of vanilla bean and warm butter drifting through my Paris pastry school kitchen – it was the day I first mastered pâte sablée, the delicate, sandy dough that cradles the most exquisite of French fruit tarts. Now, in my little New York City kitchen, I’ve taken that classic training and woven in the caramel-kissed nuttiness my Moroccan mother adores, creating these elegant strawberry tartlets with a caramelized peanut crunch. These mini strawberry tarts are the perfect spring dessert: crisp, golden shells holding a cloud of vanilla pastry cream, topped with juicy strawberries and a shatteringly crunchy caramelized peanut topping that transforms each bite into something unforgettable.
From the very first forkful, you experience a symphony of textures and flavors. The tartlet shell, baked to a rich golden hue, snaps delicately, giving way to a silk-smooth, vanilla-flecked pastry cream that practically melts on your tongue. Each juicy strawberry slice offers a burst of fruity freshness, and just when you think the dessert couldn’t surprise you more, the caramelized peanut crunch arrives – a salty-sweet, caramel-coated peanut topping that crackles between your teeth, balancing the creaminess and fruit with its deep, buttery nuttiness. It’s a dessert that feels both elegant enough for a dinner party and comforting enough to enjoy on a quiet afternoon with a cup of Moroccan mint tea.
What makes my version genuinely stand out is the playful contrast: while most strawberry tartlets rely solely on the fruit and cream, this caramelized peanut crunch brings an unexpected texture and a nod to my Moroccan roots, where nuts and caramel often find their way into festive sweets. I’ll let you in on a few secrets – like why freezing your dough-lined pans is the single most critical step for a crisp, never soggy bottom, and how to make a foolproof vanilla pastry cream that won’t turn lumpy. Stick with me, and I promise you’ll craft mini tarts that look straight out of a Parisian pâtisserie but taste like a heartfelt fusion of my two culinary worlds.
Why This Elegant Strawberry Tartlets Recipe Is the Best
The Flavor Secret. My unique twist – the caramelized peanut crunch – isn’t just a garnish; it’s an integral layer that deepens every mouthful. The peanuts are roasted first to release their oils, then coated in a quick, amber caramel that hardens into a glossy, brittle-like crunch. This salty-sweet element plays beautifully against the sweet strawberries and vanilla pastry cream, and it’s a trick I learned in my mother’s Moroccan kitchen, where she’d top orange-blossom-scented cakes with caramelized almonds. Here, I swapped almonds for roasted peanuts to give it a more approachable, all-American feel while still delivering that intense caramel flavor.
Perfected Texture. Achieving a crisp tartlet shell that doesn’t soften under the pastry cream is not just about blind baking – it’s about technique. I freeze the dough-lined pans until rock hard, then blind-bake at a high initial temperature. This ensures the butter in the pâte sablée creates steam pockets that lift the dough into a flaky, crisp structure before the pastry cream even touches it. The result is a shell so sturdy and delicate that you can fill it hours in advance and still get that satisfying snap. Every component here – the silky pastry cream, the just-set caramel coating on the peanuts, the ripe strawberry slices – is engineered for a perfect equilibrium of textures.
Foolproof & Fast. Though it looks impressive, this recipe is remarkably forgiving. You can make the pastry cream a day ahead, which actually improves its flavor and allows it to set firmly. The tartlet shells can be blind-baked the night before, too, and stored in an airtight container. Come serving time, assembly takes just 10 minutes. I’ve even taught this to friends who rarely bake, and they’ve nailed it on the first try. The key is to follow the chilling times religiously and not rush the caramel – patience here pays off with a truly magnificent dessert.
Strawberry Tartlets Ingredients
I source my butter at the Union Square Greenmarket, always looking for that deep yellow hue that signals high butterfat, perfect for a flaky tart shell. The strawberries, of course, must be peak-season, fragrant berries that stain your fingers – there’s no room for pale, woody out-of-season ones. And the peanuts? I keep a jar of roasted, unsalted ones in my pantry, ready to be transformed into that addictive caramelized crunch. Here’s everything you’ll need, all in US measurements.
Ingredients List
- For the Tartlet Shells: 1 1/4 cups all-purpose flour, 1/4 cup powdered sugar, 1/4 teaspoon salt, 1/2 cup cold unsalted butter cubed, 1 large egg yolk, 2 tablespoons ice water
- For the Vanilla Pastry Cream: 2 cups whole milk, 1/2 cup granulated sugar, 1/4 cup cornstarch, 4 large egg yolks, 2 teaspoons vanilla extract, 2 tablespoons unsalted butter
- For the Caramelized Peanut Crunch: 1/2 cup roasted unsalted peanuts chopped, 1/4 cup granulated sugar, 2 tablespoons water, 1 tablespoon unsalted butter
- For Assembly: 1 pound fresh strawberries hulled and sliced, mint leaves for garnish (optional)
Ingredient Spotlight
All-Purpose Flour. The backbone of our tartlet shells, it provides the perfect balance of structure and tenderness. In US grocery stores, you’ll find it universally – I prefer unbleached for a slightly nuttier flavor. If you need a gluten-free version, a high-quality 1-to-1 gluten-free baking flour blend (like Bob’s Red Mill) works surprisingly well; the dough will be a bit more fragile but still crisp. Just handle it gently and chill thoroughly.
Cold Unsalted Butter. This is non-negotiable for a flaky, melt-in-your-mouth crust. The butter must be straight from the fridge, cut into small cubes, and kept cold throughout processing. If you’re dairy-free, swap in a high-fat vegan butter stick (such as Miyoko’s); the crust will be slightly less rich but still delicious. Just be sure it’s well-chilled. I learned in Paris that French butter with 82% fat makes the most tender pastry, but any good-quality unsalted butter works beautifully.
Fresh Strawberries. Look for bright red, fragrant berries with fresh green caps – the smaller, intensely sweet varieties like Albion or Chandler are ideal. Out of season, you could substitute ripe raspberries or sliced peaches, but note that raspberries release more moisture and will soften the tartlets faster. Always pat fruit dry after washing to prevent sogginess. If strawberries are less sweet, toss them with a teaspoon of sugar 10 minutes before using to draw out juices, then drain before assembling.
Roasted Peanuts. I call for unsalted, roasted peanuts because roasting deepens their flavor before caramelizing. You can buy them pre-roasted, or quickly roast raw peanuts in a dry skillet until fragrant. Substitution: almonds (sliced or chopped), cashews, or pecans all work wonderfully, each lending its own character – almonds give a firm, clean snap, while pecans add a buttery richness. Just be sure to keep the nut size small enough to sprinkle easily.
| Original Ingredient | Best Substitution | Flavor / Texture Impact |
|---|---|---|
| All-purpose flour | Gluten-free 1:1 flour blend | Slightly more crumbly, but still crisp; handle dough gently. |
| Unsalted butter | High-fat vegan butter stick | Less rich, slightly different flavor, but still yields a flaky crust. |
| Fresh strawberries | Ripe raspberries or sliced peaches | Juicier fruit may soften tartlets faster; drain well and serve sooner. |
| Roasted peanuts | Almonds, cashews, or pecans | Different nut flavor, but still crunchy and caramelized; adjust toasting time. |
How to Make Elegant Strawberry Tartlets — Step-by-Step
Don’t let the multiple components intimidate you – we’ll tackle each one calmly, and I’ll guide you through every detail, from the silky pastry cream to that irresistible crunchy topping. Just follow along, and you’ll have a tray of stunning strawberry tartlets that look and taste like they came from a patisserie.
Step 1: Make the Tartlet Dough
In a food processor, pulse 1 1/4 cups all-purpose flour, 1/4 cup powdered sugar, and 1/4 teaspoon salt until blended. Add 1/2 cup cold cubed unsalted butter and pulse until the mixture looks like coarse crumbs with some pea-sized butter bits. Then add the egg yolk and 2 tablespoons ice water; pulse just until the dough begins to clump together. Turn it out onto a lightly floured surface, shape into a flat disk, wrap in plastic, and refrigerate for at least 30 minutes (or up to 2 days).
💡 Lalybeth’s Pro Tip: Keep everything cold – if your butter starts to soften, pop the work bowl and blade in the freezer for 10 minutes before processing. This ensures a flaky, tender crust later.
Step 2: Shape and Chill the Tartlet Shells
Preheat your oven to 375°F (190°C). Roll the chilled dough on a floured surface to an even 1/8-inch thickness. Using a round cutter slightly larger than your tartlet pans (2–3 inches in diameter), cut out circles. Gently press each round into a tartlet pan, making sure to fit it snugly into the corners and up the sides. Prick the bottoms several times with a fork, then place the pans in the freezer for exactly 15 minutes. This hardens the dough and prevents shrinking.
⚠️ Common Mistake to Avoid: Skipping the freezer step is the number one cause of soggy, shrunken shells. Those 15 minutes are crucial – the solid butter will steam in the oven, creating the flakiest layers.
Step 3: Blind-Bake the Tartlet Shells
Line each frozen shell with a small piece of parchment paper or a cupcake liner, and fill with pie weights, dried beans, or rice. Bake for 12 minutes. Carefully remove the weights and parchment, then return the shells to the oven for an additional 5–7 minutes, until the edges and bottoms are golden and crisp. Let them cool completely in the pans on a wire rack before unmolding.
💡 Lalybeth’s Pro Tip: To guarantee an extra-crisp bottom, brush the inside of each warm shell with a thin layer of melted white chocolate or apricot jam. This seals the crust and adds a subtle sweetness that pairs beautifully with the cream.
Step 4: Make the Vanilla Pastry Cream
In a medium saucepan, warm 2 cups whole milk over medium heat until you see small bubbles around the edge – do not let it boil. Meanwhile, in a heatproof bowl, whisk together 1/2 cup granulated sugar, 1/4 cup cornstarch, and 4 large egg yolks until the mixture is pale and smoothly combined. Gradually pour the hot milk into the yolk mixture while whisking constantly to temper the eggs. Return everything to the saucepan and cook over medium heat, whisking vigorously, until the cream thickens and large bubbles break the surface – about 2–3 minutes. Off the heat, stir in 2 teaspoons vanilla extract and 2 tablespoons butter until melted and glossy. Transfer to a clean bowl, press plastic wrap directly onto the surface (to prevent a skin), and chill for at least 2 hours, or preferably overnight.
⚠️ Common Mistake to Avoid: If you see lumps forming, immediately remove the pan from heat and pour the cream through a fine-mesh strainer while it’s still hot. Then continue cooking gently until smooth. The culprit is usually too high heat or not whisking continuously.
Step 5: Make the Caramelized Peanut Crunch
In a small non-stick skillet, stir together 1/4 cup sugar and 2 tablespoons water. Heat over medium without stirring – just swirl the pan occasionally – until the sugar dissolves and turns an amber color, about 5 minutes. Quickly add 1/2 cup chopped roasted peanuts and 1 tablespoon butter, then stir rapidly to coat. Immediately spread the mixture in a thin layer on a sheet of parchment paper. Let it cool completely until hard, then break into small pieces or chop coarsely.
💡 Lalybeth’s Pro Tip: To prevent crystallization, resist the urge to stir the sugar-water before it reaches amber. If you see crystals forming on the sides, brush them down with a wet pastry brush. Work fast once you add the nuts and butter – caramel sets in seconds.
Step 6: Assemble the Tartlets
Spoon or pipe the chilled pastry cream into each cooled tartlet shell, filling it almost to the top. Arrange sliced fresh strawberries attractively over the cream – overlapping them in a fan pattern looks especially elegant. Generously sprinkle the caramelized peanut crunch over the strawberries. If desired, tuck a few small mint leaves among the berries for a pop of green. Serve immediately, or refrigerate up to 2 hours before serving (any longer, and the crunch will soften slightly).
⚠️ Common Mistake to Avoid: Don’t add the crunch topping too early if you’re not serving right away – the humidity of the fridge can make the caramel sticky. Always sprinkle just before setting the tartlets on the table.
| Step | Action | Duration | Key Visual Cue |
|---|---|---|---|
| 1 | Make Tartlet Dough | 15 min | Dough holds together when pressed |
| 2 | Shape & Chill Shells | 45 min (incl. chilling) | Frozen, firm dough in pans |
| 3 | Blind-Bake Shells | 17–19 min | Golden, crisp edges |
| 4 | Make Pastry Cream | 10 min + chill 2 hrs | Thick, glossy, coats the back of a spoon |
| 5 | Caramelize Peanuts | 8 min | Amber caramel, hard brittle |
| 6 | Assemble Tartlets | 5 min | Beautifully arranged strawberries and crunch |
Serving & Presentation
When I plate these strawberry tartlets for a spring luncheon, I like to set them on a wide white platter so their golden shells and ruby berries really pop. A light dusting of powdered sugar over the top right before serving adds a final touch of elegance, and a few fresh mint leaves scattered among them look like they’ve just come from the garden. I often serve them with a small pitcher of extra strawberry coulis on the side, letting guests drizzle as much or as little as they like – it’s a trick I picked up in a Parisian salon de thé.
For a more casual NYC rooftop gathering, I’ll set out the tartlets on a rustic wooden board with a bowl of the caramelized peanut crunch so friends can sprinkle on more if they crave that extra salty-sweet crackle. Pair them with a glass of cold rosé or a steaming cup of Moroccan mint tea – the subtle floral notes of the tea harmonize beautifully with the vanilla pastry cream and the nutty caramel. If you’re hosting a special occasion, consider plating each tartlet with a quenelle of lightly whipped cream and a drizzle of dark chocolate sauce for pure indulgence.
| Pairing Type | Suggestions | Why It Works |
|---|---|---|
| Side Dish | Lemon sorbet, fresh fruit salad | Light, palate-cleansing contrast to the rich cream. |
| Sauce / Dip | Strawberry coulis, dark chocolate ganache, whipped cream | Adds moisture and intensifies fruit or chocolate notes. |
| Beverage | Moroccan mint tea, espresso, Sauternes wine | Tea complements vanilla, coffee balances sweetness, sweet wine elevates elegance. |
| Garnish | Mint leaves, edible flowers, powdered sugar | Adds color, freshness, and a professional finish. |
Make-Ahead, Storage & Reheating
One of the reasons these strawberry tartlets have become a staple in my busy NYC life is their make-ahead friendliness. I often bake the tartlet shells on a quiet Sunday, store them airtight, and then the night before a dinner party, whip up the pastry cream so it’s perfectly chilled by the next day. The caramelized peanut crunch can be prepared in the morning, kept at room temperature, and all I have to do is slice strawberries and assemble right before guests arrive – it’s the ultimate stress-free elegant dessert.
| Method | Container | Duration | Reheating / Serving Tip |
|---|---|---|---|
| Refrigerator (filled tartlets) | Airtight container, unstacked | 1–2 days | Crunch will soften; best eaten cold, no reheating. |
| Freezer (unfilled shells) | Wrap in plastic, then foil | Up to 1 month | Thaw, then re-crisp in 300°F oven for 5 min. |
| Make-Ahead (pastry cream) | Bowl, plastic wrap directly on surface | Up to 2 days ahead | Whisk before using to restore silkiness. |
| Make-Ahead (peanut crunch) | Airtight container at room temp | 1 day | If sticky, pop in fridge for 10 min to harden. |
A quick word on refreshing leftovers: if you find the tartlet shells have lost a bit of their snap after a day in the fridge, pop just the shells (without any cream) into a 300°F oven for 3–5 minutes and they’ll regain their crispness. However, once cream and strawberries are in place, reheating isn’t possible – so I’d recommend assembling only what you plan to serve. The unfilled shells, though, can be stored and revived for up to a week in the pantry, ready to be filled with a fresh batch of pastry cream whenever the craving strikes.
I learned from my mother that a dessert can be both elegant and practical. So, if you’re prepping for a celebration, bake the shells, make the cream, and chop the peanuts ahead. On the day of, simply assemble and watch your guests marvel at how effortlessly you pulled off such a showstopper.
Variations & Easy Swaps
| Variation | Key Change | Best For | Difficulty Impact |
|---|---|---|---|
| Classic Strawberry Tartlets (No Crunch) | Omit peanut crunch; optional glaze | Purists, simpler presentation | Easier (one less component) |
| Gluten-Free Strawberry Tartlets | Use GF flour blend; handle dough with care | Gluten-sensitive guests | Slightly more fragile; medium |
| Tropical Strawberry Tartlets | Swap strawberries for mango, add lime zest to cream | Summer parties, exotic twist | Medium (fruit moisture adjustment) |
Classic Strawberry Tartlets (No Crunch)
Sometimes simplicity is the ultimate elegance. If you prefer a more traditional French strawberry tartlet, simply leave out the caramelized peanut crunch and let the pure harmony of buttery pastry, vanilla cream, and fresh strawberries shine. You can brush the berries with a warm apricot glaze for a glossy finish – a technique I was taught during my Paris training. It’s still an exquisite dessert, and a little less sweet, perfect for those who favor the clean fruit-and-cream combination.
Gluten-Free Strawberry Tartlets
For my gluten-sensitive friends, I’ve tested this recipe with a top-quality 1-to-1 gluten-free flour blend and it works beautifully. The dough is a bit more delicate, so be extra gentle when rolling and transferring to the pans. I also recommend adding an extra tablespoon of ice water if the dough seems crumbly. The resulting shells remain crisp and rich, and when filled with that velvety pastry cream, no one will guess they’re gluten-free. Just remember to chill the dough longer – at least 1 hour – before rolling.
Tropical Strawberry Tartlets
Late in summer, when mangoes are exploding with fragrance at my NYC greenmarket, I love swapping the strawberries for ripe, diced mango. The creamy vanilla pastry cream gets a lift from a teaspoon of lime zest stirred in, and I replace the peanut crunch with toasted coconut chips that I caramelize in the same way. It’s a sunshine-bright variation that transports me straight to a Moroccan seaside café. If you use mangoes, just be sure to drain them well after slicing to avoid any excess juice softening the shells.
How do you keep the tartlet shells from getting soggy after adding the pastry cream and strawberries?
To keep your strawberry tartlets crisp, start with a thorough blind-bake until the shells are deeply golden. After baking, I often brush the insides with a thin layer of melted white chocolate or strained warm apricot jam – this forms a moisture barrier. Additionally, always chill your filled pastry cream before adding it, and assemble as close to serving time as possible. If you need to prep ahead, store the shells, cream, and crunch separately, then fill just before presenting. These little steps ensure each bite stays delightfully crunchy.
Can I substitute the caramelized peanuts with another nut or leave them out?
Absolutely! Almonds, cashews, or pecans make wonderful substitutes – just use roasted, unsalted nuts for the best flavor. Chopped hazelnuts are particularly lovely with strawberries. If you’d like to leave the crunch out entirely, the tartlets become a classic French strawberry tart, still delicious. For a nut-free option, try caramelizing toasted coconut flakes or cacao nibs. The key is to work quickly when caramelizing, as any nut or seed will seize if the caramel cools too fast. Each alternative brings its own personality, so feel free to experiment.
How far ahead can I assemble these strawberry tartlets without them becoming soggy?
For best results, assemble the tartlets no more than 2–3 hours before serving. The shells will stay crisp for a little while if they’ve been properly sealed and the pastry cream is chilled. If you need to prepare further in advance, I recommend filling the shells with cream and refrigerating them, then topping with strawberries and the peanut crunch right before guests arrive. The caramelized peanut topping, in particular, should be added last to maintain its signature crunch. Proper planning lets you serve a stunning dessert without a last-minute rush.
What is the best way to caramelize peanuts for the crunch topping?
My foolproof method is the dry caramel: combine sugar and a little water in a pan, then cook without stirring until it turns a deep amber. Swirl the pan gently to even out color, then quickly stir in the roasted peanuts and butter. Spread the mixture immediately on parchment paper – it hardens in minutes. This technique gives you a thin, glassy caramel that shatters beautifully. Avoid stirring early, as that can encourage crystallization. Using roasted, unsalted peanuts ensures a deep nutty flavor that pairs perfectly with the strawberries and vanilla.
Can I use frozen strawberries instead of fresh?
I don’t recommend frozen strawberries for tartlets because they release a lot of liquid as they thaw, which can make the shells soggy and dilute the pastry cream. If you’re in a pinch, thaw them completely, drain off all the juice, and pat the berries very dry with paper towels. You might also toss them with a little sugar and let them macerate, then drain again. Even so, the texture won’t be as firm as fresh. Better to choose another ripe, fresh fruit like raspberries or sliced nectarines for a top-tier result.
My pastry cream turned out lumpy; how can I fix it?
Lumps usually come from cooking over too-high heat or not whisking constantly. The good news is you can salvage it: pour the hot cream through a fine-mesh strainer to remove lumps, then whisk vigorously until smooth. To prevent lumps from the start, always temper your egg mixture by adding the hot milk slowly while whisking, and cook over medium heat while scraping the bottom and corners of the pan. A whisk is your best friend here – it keeps the cream moving so the cornstarch thickens evenly without clumping.
Can I make the tartlet shells without a food processor?
Yes, you can absolutely make the dough by hand. Cut the cold butter into small cubes, then use a pastry cutter or two knives to work it into the flour mixture until you get pea-sized crumbs. Then stir in the egg yolk and ice water with a fork until the dough just comes together. The key is to handle it as little as possible so the butter stays cold – just like in the food processor method. Hand-made dough may require a bit more patience, but the results are equally flaky and delicious.
How should I store leftover tartlets?
Store assembled tartlets in the refrigerator in a single layer, covered loosely with plastic wrap, for up to 1–2 days. The shells will gradually soften, but the flavor remains wonderful. Unfilled, fully baked shells can be kept at room temperature in an airtight container for 3–4 days. The pastry cream stays fresh in the fridge for up to 3 days when stored with plastic wrap touching the surface. The caramelized peanut crunch is best kept in an airtight container at room temperature for 24 hours – if it gets sticky, a brief chill will re-crisp it.
Can I use store-bought tartlet shells to save time?
Of course, if you’re in a hurry, high-quality store-bought mini tart shells are a convenient shortcut. Look for all-butter shells for the best flavor. I recommend brushing them with a thin egg wash and blind-baking for a few minutes according to the package directions to ensure they’re properly crisp. The taste and texture will differ from homemade, but you’ll still end up with a lovely dessert. I often keep a box in my pantry for those spontaneous dinner invitations that demand a quick, elegant finish.
Is there a dairy-free version for the pastry cream?
Yes, you can make a delicious dairy-free vanilla pastry cream. Substitute the whole milk with unsweetened almond milk or oat milk (the barista-style oat milk gives a particularly creamy texture). Use cornstarch as the thickener, and replace the butter with a good-quality vegan butter or refined coconut oil. The resulting cream is slightly less rich but still smooth and vanilla-forward. Be sure to whisk vigorously during cooking, as dairy-free milks can sometimes separate. Many of my dairy-free friends love this version and can’t tell the difference.
Share Your Version!
I truly hope you fall in love with these elegant strawberry tartlets as much as I have. There’s something magical about the way the caramelized peanut crunch surprises everyone at the table – it’s become a signature in my kitchen, and I’d be overjoyed to see it become one in yours. When you make them, I’d love to hear how it went. Leave a star rating and a comment below, and tell me: did you stick to the classic crunch, or did you try a nutty variation of your own? Your feedback helps me create recipes that fit your busy, beautiful lives.
Snap a photo of your gorgeous tartlets and share it on Instagram or Pinterest – don’t forget to tag @cookingwithlalyta so I can celebrate your creation. I’m always pinning new ideas and love resharing your kitchen triumphs. If you have any questions about the technique or want to swap fruit, drop your query in the comments; I read every single one and reply with the warmth and care I’d give a friend across the counter.
From my NYC kitchen to yours — I hope this recipe brings as much warmth to your table as it does to mine. — Lalybeth 🧡
Love This Recipe? Save It to Pinterest!
If you enjoyed this Elegant Strawberry Tartlets with Silky Vanilla Pastry Cream and Caramelized Peanut Crunch recipe, don’t let it get lost in your browser tabs! 😄 Pin it now so you can find it again anytime — and explore hundreds more tried-and-tested recipes waiting for you on my Pinterest boards.
👉 Follow Lalybeth on Pinterest @cookingwithlalyta
📌 Pin this recipe · 🔁 Re-pin your favorites · 💬 Tag me when you make it — I love seeing your creations!
Elegant Strawberry Tartlets with Silky Vanilla Pastry Cream and Caramelized Peanut Crunch
- Total Time: 1 hr 10 mins
- Yield: 12 1x
Description
Delicate mini tartlets filled with a smooth vanilla pastry cream, topped with fresh strawberries and a crunchy caramelized peanut topping. Perfect for a spring dessert or special occasion.
Ingredients
- For the Tartlet Shells:
- 1 1/4 cups all-purpose flour
- 1/4 cup powdered sugar
- 1/4 teaspoon salt
- 1/2 cup cold unsalted butter, cubed
- 1 large egg yolk
- 2 tablespoons ice water
- For the Vanilla Pastry Cream:
- 2 cups whole milk
- 1/2 cup granulated sugar
- 1/4 cup cornstarch
- 4 large egg yolks
- 2 teaspoons vanilla extract
- 2 tablespoons unsalted butter
- For the Caramelized Peanut Crunch:
- 1/2 cup roasted peanuts, chopped
- 1/4 cup granulated sugar
- 2 tablespoons water
- 1 tablespoon unsalted butter
- For Assembly:
- 1 pound fresh strawberries, hulled and sliced
- Mint leaves for garnish (optional)
Instructions
- Make the Tartlet Shells: In a food processor, pulse flour, powdered sugar, and salt. Add cold butter cubes and pulse until mixture resembles coarse crumbs. Add egg yolk and ice water; pulse until dough just comes together. Turn dough out onto a floured surface, shape into a disk, wrap in plastic, and chill for at least 30 minutes.
- Preheat oven to 375°F (190°C). Roll out dough on a floured surface to 1/8-inch thickness. Cut into rounds slightly larger than your tartlet pans (2-3 inch diameter). Press dough into pans, prick bottoms with a fork, and freeze for 15 minutes.
- Line tartlet shells with parchment and fill with pie weights or dried beans. Bake for 12 minutes, remove weights and parchment, and bake for another 5-7 minutes until golden. Let cool completely.
- Make the Pastry Cream: In a medium saucepan, heat milk over medium heat until just simmering. In a separate bowl, whisk together sugar, cornstarch, and egg yolks until smooth. Gradually pour hot milk into egg mixture while whisking constantly. Return mixture to saucepan and cook over medium heat, whisking continuously, until thickened (about 2-3 minutes). Remove from heat; stir in vanilla and butter until melted. Transfer to a bowl, cover surface with plastic wrap, and chill until cold (at least 2 hours).
- Make the Caramelized Peanut Crunch: In a small non-stick skillet, combine sugar and water. Cook over medium heat without stirring until amber-colored (about 5 minutes). Swirl pan gently. Add peanuts and butter; stir quickly to coat. Immediately spread on parchment paper to cool. Once hard, chop into small pieces.
- Assemble Tartlets: Fill each cooled tartlet shell with pastry cream. Arrange sliced strawberries on top. Sprinkle with caramelized peanut crunch. Garnish with mint if desired. Serve immediately or refrigerate until serving.
Notes
To make a larger tart, use a 9-inch tart pan and adjust baking time. Pastry cream can be made a day ahead. Caramelized peanuts should be used soon after making to maintain crunch.
- Prep Time: 45 mins
- Cook Time: 25 mins
- Method: Dessert
- Cuisine: French
Nutrition
- Calories: 320
- Sugar: 22g
- Fat: 18g
- Carbohydrates: 38g
- Protein: 5g
Tried This Recipe? Leave a Comment!
Did you make this recipe? I’d love to hear how it turned out! Please leave a comment and a rating below. Your feedback helps other home cooks and supports cookingwithlalyta.com!
For more delicious inspiration, follow me on Pinterest!